What happens when you mix your pyrography, leather crafting, jewelry work, and lots of bright colors … You create unique pyrography leather jewelry. Another free, online project at LSIrish.com.
Please share this project with your FaceBook friends!
Our Greenman Leather Pyrography Bullet Journal Cover is worked on 7 to 8 ounce vegetable dyed leather and laced using waxed linen thread and two bamboo skewers. The completed journal opens at the bottom, with the lacing for the bullet journal pages on the back of the journal. You can open the cover and completely roll the cover to the back to have easy, full access to your pages.
28 large-sized, step-by-step photos spread over 7 pages, with complete instructions, a free Greenman pattern, and printable bullet journal pages.
This project is a great compliment to me recent Greenman Leather Slop Bag Project. Check it out as the free pattern for this project would create a wonderful design when you are ready to burn your second bullet journal cover.
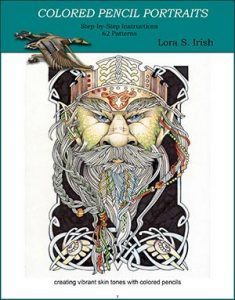
For more ideas to use with this Bullet Journal Cover project you may wish to check out ArtDesignsStudio.com’s newest E-Project, Colored Pencil Portraits.
146 pages of instructions, patterns, and ideas including 6 in-depth step-by-step portrait projects and 62 patterns for wood spirits, greenmen, shamans, wizards, vampires, dragons, and assorted designs.
On SALE through June 4th, only $9.50 regular price $14.95
Check out our other E-Book on sale in the right-hand nav bar.
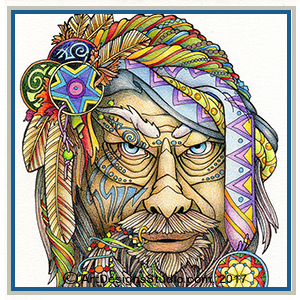
62 line art patterns and designs featuring Wood Spirits, Greenmen, Shamans, Wizards, Pixies, and even Vampires. Also included is an assortment of fun designs featuring Henna Flowers, Dragons, Winged LIzards, and more. As an added bonus this package includes 12 fully colored or pencil shaded designs to guide you in your craft work.
Ready for you to download to your computer and print from your home printer, available at ArtDesignsStudio.com, Lora S. Irish’s pattern store.
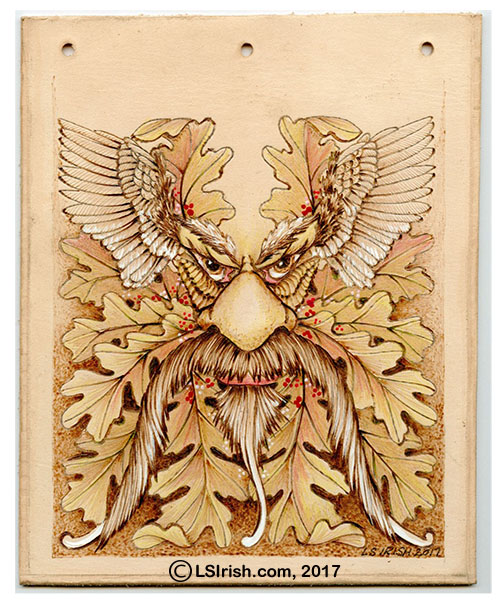
To often I am so serious about our pyrography work, carefully planning each layer of burning, examining every stroke for even thickness and tonal value, trying to create as perfect as possible a realistic reproduction.
But once in a while I just ‘wanna have fun’. And this is the perfect, just have fun project. Because this was created as a text run for my new book, The Art of Leather Burning, I wasn’t concerned about absolutely matching ever corner or seam, or carefully measuring the distance between every stitching awl hole, or even about how the fill patterns I chose matched the ones I had already burned. The entire idea behind this leather burned purse was to just see what I could do, and how I could do it.
I am a strong advocate of practice boards. Usually this is a small scrap of the same material from which you will work your main project upon which you can experiment with your temperature settings, pen tips, and fill patterns.
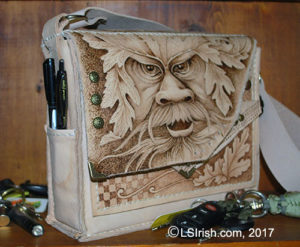
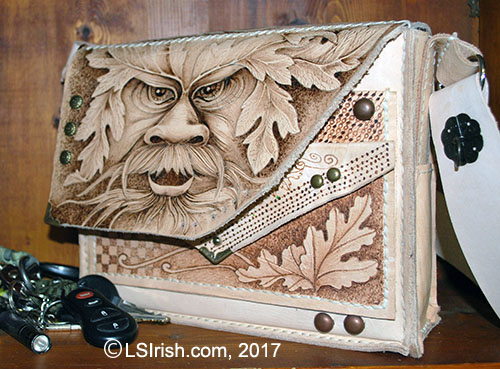
Well, this time, when I began my work with pyrography on leather, my practice board got a touch out of hand. I began my text project with a 10 lb. scrap bag of vegetable-dyed leather from Springfield Leather Co. which contained a variety of weights, textures, and species of leather pieces.
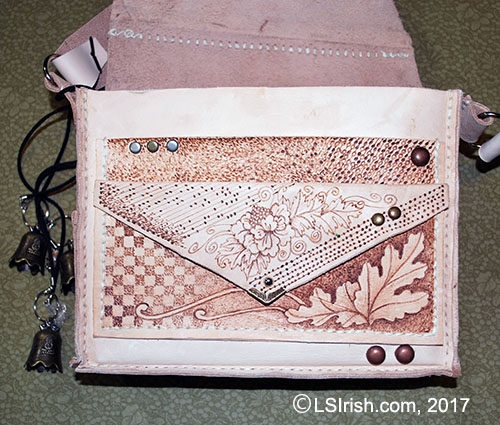
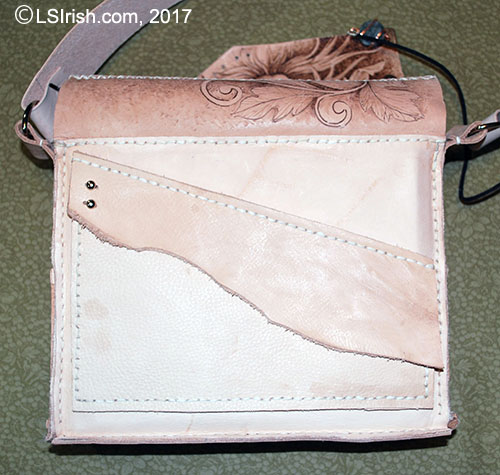
What came out of this practice session was a Greenman Slop Bag! This rough and rugged purse measures 7 1/2″ high, 9 1/2″ wide, and 2 3/4″ thick. The front of my purse has a double pocket and the back has one large pocket with a hidden pocket inside of it. Its constructed using an awl to create the stitching holes and the simple double-needle stitching pattern.
I’m not done with this purse yet. To date I have only gotten the front flap, top roll over, and front of the purse body burned. So I still have the entire back, the sides, and the should strap on which to play, and experiment with more fill textures, shading ideas, and even miniature patterns.
Play, practice, experiment, and create … that is our goal!
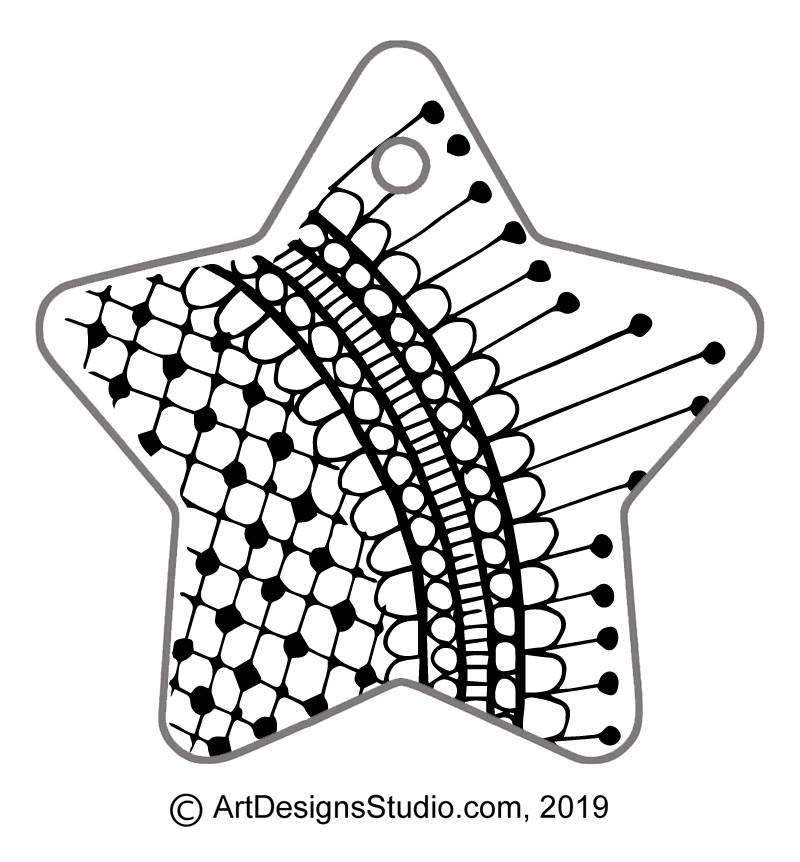
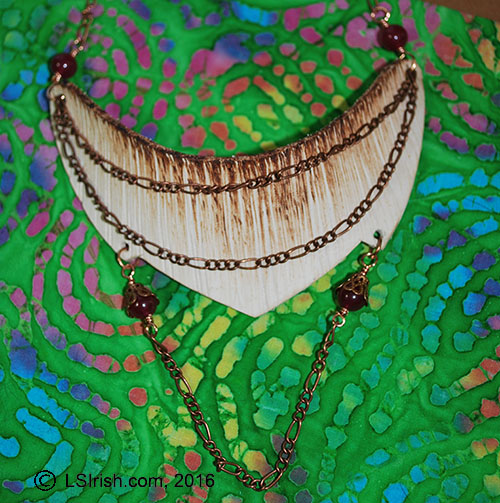
SUPPLIES 5” X 3” (14 cm x 7.5 cm) vegetable-tanned leather 2 – 6” lengths of copper chain for necklace 1 – 5” length of copper chain for top hanging chain 1 – 7” length of copper chain for middle hanging chain 1 – 4” length of copper chain for beaded chain 4 – 6 mm round adventurite beads 2 – 6 mm split rings 1 – lobster claw latch 18” – 20-gauge or 18-gauge copper wire
Using your loop-tip, or ball-tip, burn thin, straight lines onto the leather shape. Begin the lines at the top edge of the leather and pull the lines to the center area of the leather. Work several layers of burned lines, beginning on a medium heat setting and working towards a hot temperature setting. Use a v-gouge to cut vertical lines in the leather, creating white lines through the burned areas.
Navajo Nation
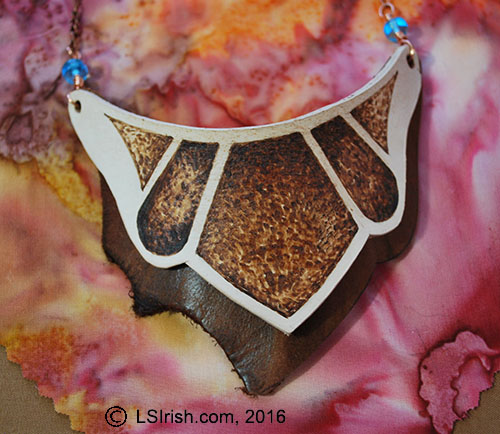
SUPPLIES 1 – 5 1/2” x 3 1/2” (14 cm x 9 cm) medium weight, vegetable-tanned leather 1 – 5 1/2” x 4” (14 cm x 10.25 cm) medium weight, dark brown scrap leather 2 – 7 1/2” (19 cm) lengths of copper chain 18” length of 20- or 18-gauge copper wire 2 – 8 mm turquoise glass crow roller beads 2 – 6 mm split rings1 – lobster claw latch
Trace the pattern to your vegetable-dyed leather. Using a loop-tip or ball-tip burning pen, fill in each area with a medium temperature burn. Increase the temperature setting slightly and burn a second layer of strokes to the top half of each area. Increase the temperature again to a hot setting and following the photo burn in the black-toned areas of the design. The round end loop of the turquoise glass bead link is worked through both layers of leather.
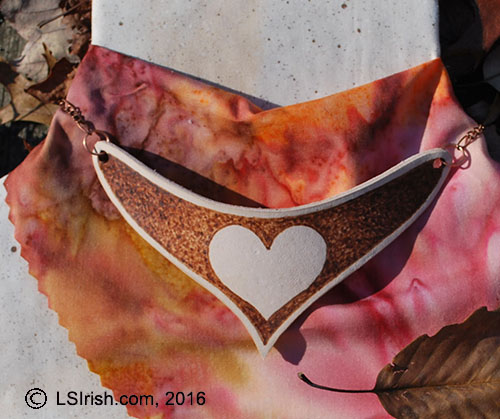
Forever Yours
SUPPLIES 1 – 5 1/2” x 3” (14 cm x 7.5 cm) medium weight, vegetable-tanned leather 2 – 10 mm copper jump rings 2 – 6 mm copper split rings 2 – 7” (17.75 mm) lengths of copper chain 1 – lobster claw latch
Trace your pattern to the vegetable-tanned leather. With your pyrography unit set on a medium temperature setting, using a ball-tip or shader-tip pen, begin filling the areas of the pattern outside of the heart design with a medium-light tonal value. Use any fill or texture pattern that you like. Work a second layer of burning on a slightly hotter temperature setting at the center point of the leather necklace and in the outer half of each side. A third burning at a still slightly hotter setting is worked in the outer one-third of each side of the necklace.
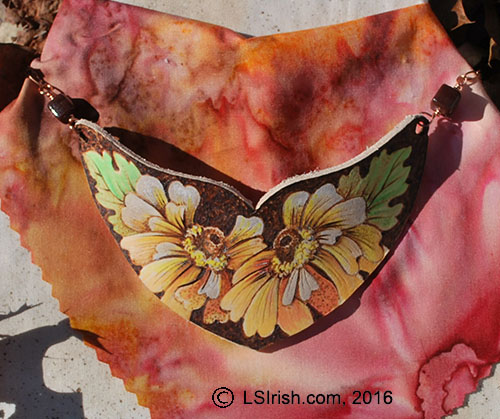
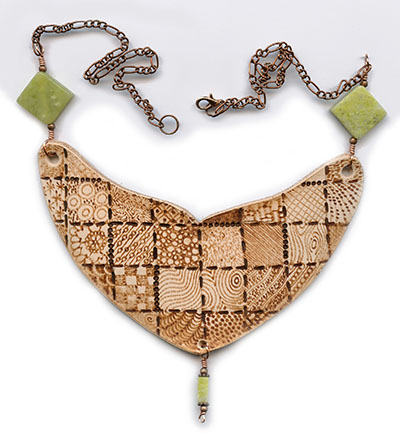
Summer Dreams
SUPPLIES 5 1/2” x 3 1/2” (14 cm x 9 cm ) medium weight vegetable-tanned leather 2 – 8 mm square glass beads 2 – 7” ( 18 cm ) long copper chain 2 – 6 mm split rings1 – lobster claw latch 18” – 20-gauge or 18-gauge copper wire
You can add color to your leather burned jewelry by using artist quality colored pencils. Begin this project by tracing your pattern to the cut leather. With your finest line pen, outline the entire pattern to a dark tonal value. Add shading in the petals and leaves using your shader-tip on a medium hot setting. Work the background in a solid dark tone. When the burning is complete begin adding your color in thin, light layers of pencil work. Use one color over another to create new hues. When the burning is complete begin adding your color in thin, light layers of pencil work. Use one color over another to create new hues. When the coloring is complete give your necklace one to two coats of brush-on acrylic finish.
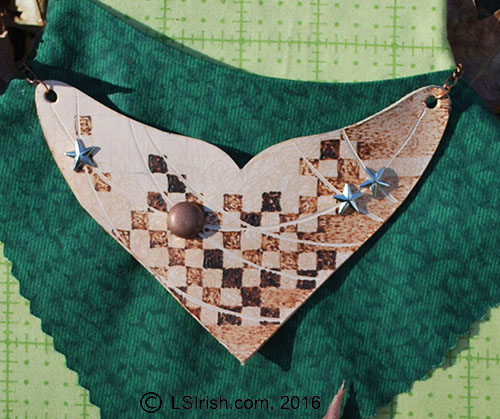
Steamed
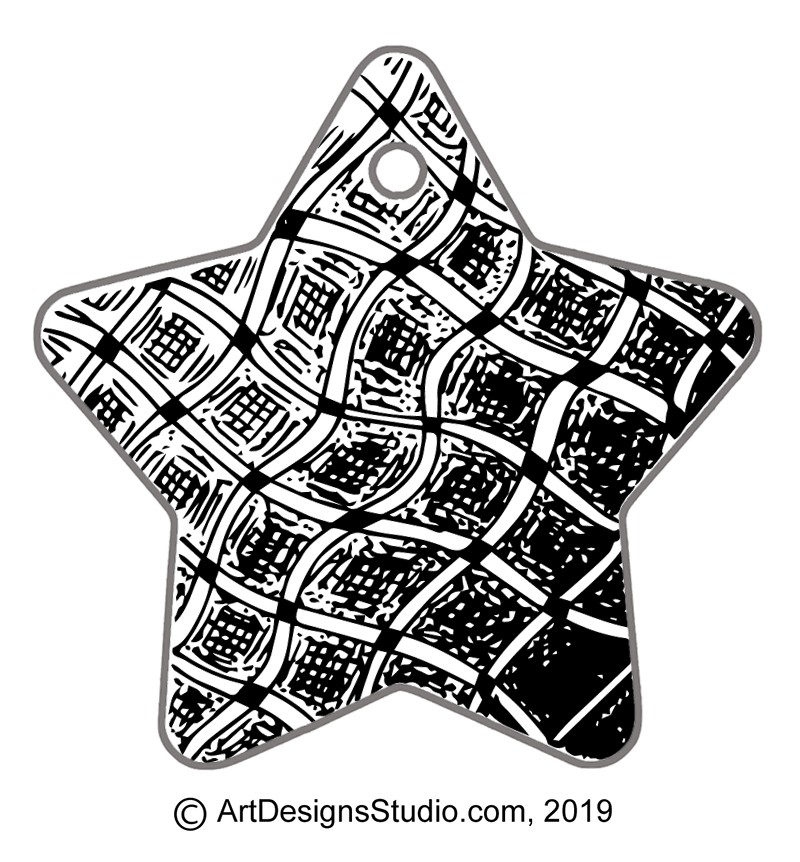
SUPPLIES 5 1/2” x 4” (14 cm x 10.25 cm) medium weight vegetable-tanned leather 2 – 7” ( 18 cm ) long copper chain 2 – 6 mm split rings 1 – lobster claw latch 18” – 20-gauge or 18-gauge copper wire Assorted leather brads and decorative rivets
With a pencil, create a 1/4” grid on the face of your leather necklace. Fill the grid squares in a checkerboard pattern, varying the tonal values. Fill the right side of the necklace squares with this medium setting tonal value to make the larger block areas. With a low temperature fill the un-worked squares in the central area with a fill texture. Place a small ceramic plate face-down onto your leather and mark a pencil line. With a craft knife cut along the line, on both sides, to open a groove. Add your decorative brads and rivets.
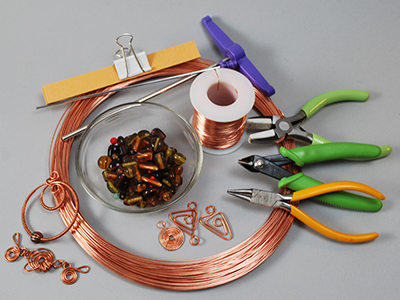
Wire-bent and wire-wrapped jewelry is an art that is currently in high favor among crafters. Jewelry supplies are readily available at most large box craft stores and through online shopping.
For my leather burnt necklaces I chose copper wire and findings, but there is a wide variety of wire types that you can use as silver, silver-coated, black, and colored aluminum. Personally, I prefer copper as it is a soft, easy to bend metal that can be tempered through gently hammering into strong, secure links and chains.
Glass beads and lamp work beads are also a favorite for me in jewelry work, but you will find a wonderful selection of gemstones, cut crystal beads, resin beads, and even bone or shell beads that you can use.
Completing your necklace
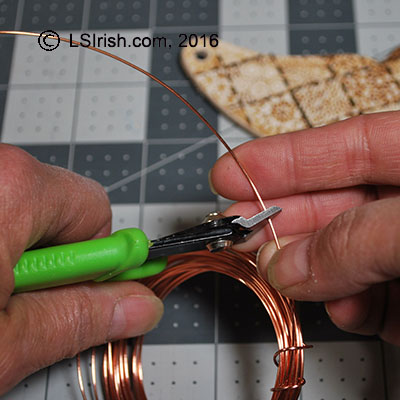
1 Cut an 8” length of 18-gauge copper wire with your flush cutters.
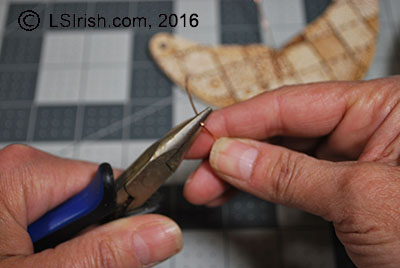
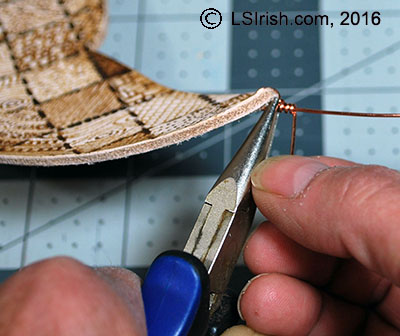
2 Grip the wire about 3” from one end in your straight pliers. Bend the wire to a 90 degree angle. Move the wire to your round-nose pliers, gripping the wire at the 90 degree angle. Roll the 3” end around the round-nose pliers to create a small loop.
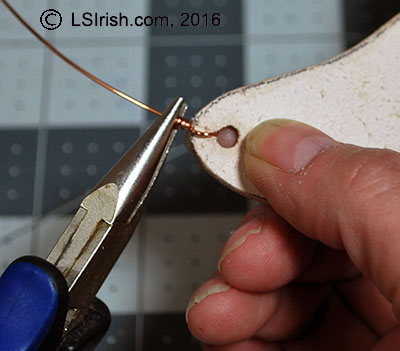
3 Slide the short end of the wire through one of the holes in your leather burnt necklace. Move the wire to center the leather inside of the small loop.
Secure the loop
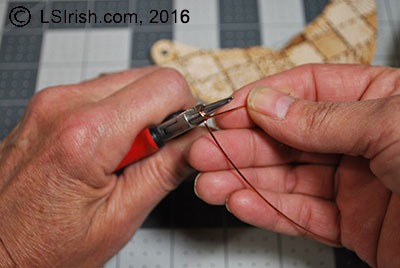
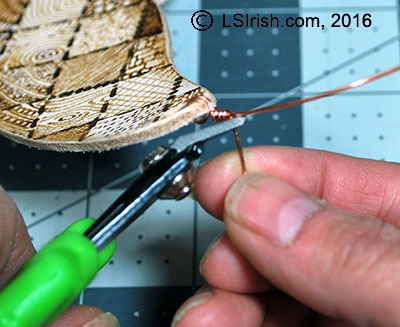
4 Grip the top of the loop, where it overlaps the long working end of the wire in your straight pliers. Roll the short end of the wire around the long working wire two to three times.
5 Clip the excess short wire with your flush cutters.
6 With your straight pliers crimp the cut end tightly against the long working wire.
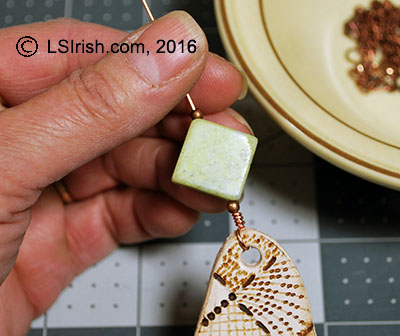
Adding beads
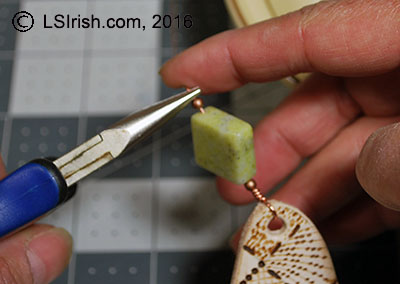
7 Slide your chosen beads onto the long working wire. In my necklace I used one 2-mm copper bead, one 16-mm square yellow jade bead, and one 2-mm copper bead.
8 Grip the working wire in your straight pliers, with the tip of the pliers against the last bead. Bend the working wire into a 90 degree angle.
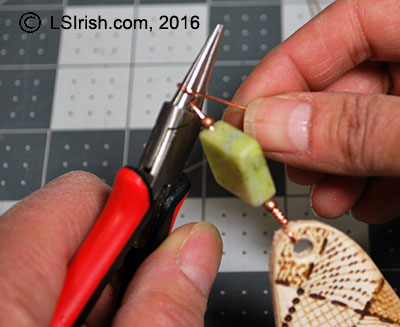
9 Place the 90 degree angle into your round-nose pliers and roll the working wire into a small loop.
Adding the chain
10 The second small loop should be created by holding the wire in the same spot or area of the round-nose pliers as you did the first loop. This keeps the two end loops of the bead dangle the same size.
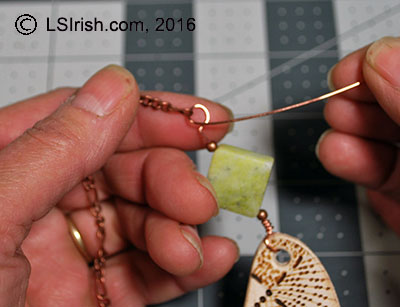
11 Cut two sections of 2- to 3-mm copper chain 7” long each. Slide the last open link of the chain onto the short end of the loop wire. Move the chain link to the center of the loop.
12 Complete your wire wrapped bead dangles by gripping the small loop in your straight pliers and wrapping the short end wire around the base of the loop two to three times.
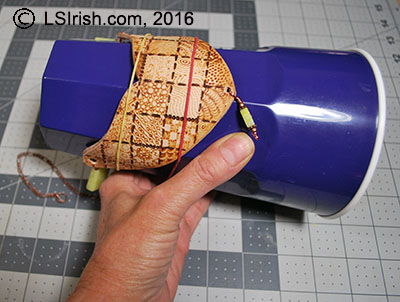
Shaping the leather
17 Your leather burned necklace can easily be shaped by simply placing your finished necklace under your kitchen faucet for a few moments, allowing the leather to become wet. Pat the leather necklace dry on a clean cloth. While the necklace is still damp and pliable, lay the necklace on a large, plastic soda glass and with loose (oversized) rubber bands lightly secure into place. Let the necklace dry overnight.
Completed necklace
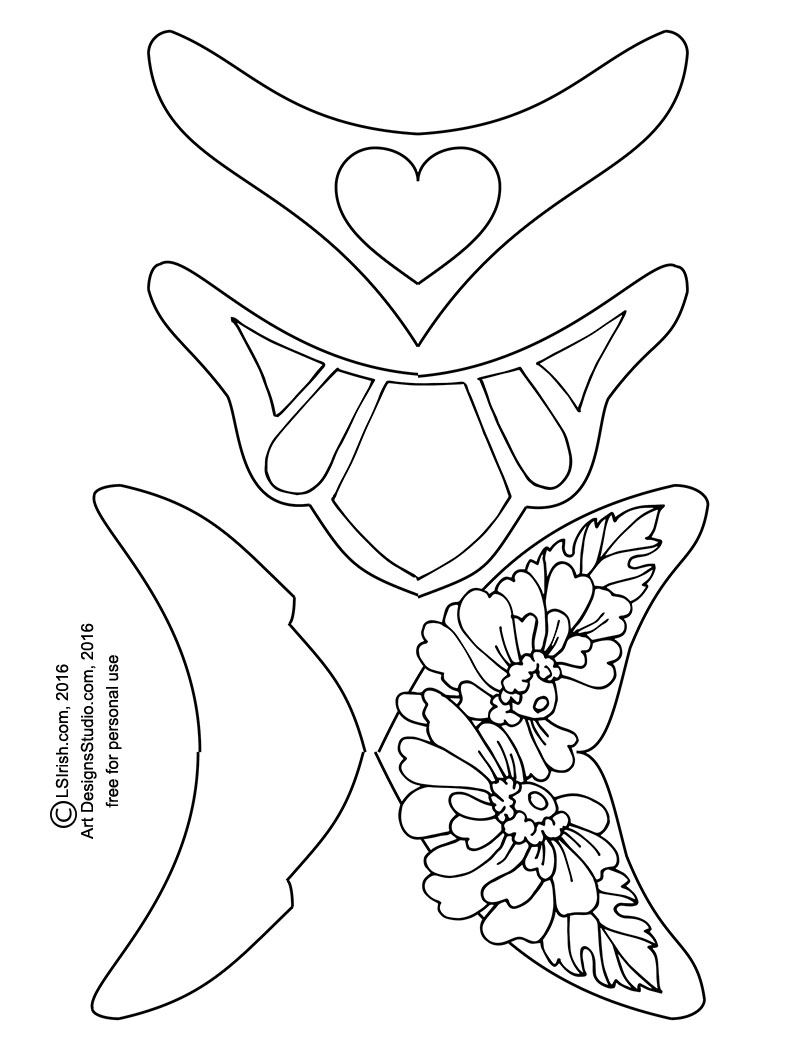
In the next post I will be sharing five more ideas for this leather burned necklace project, with the free patterns. But here is a preview …