 Marbleizing with Oils over Acrylics
Acrylic Paint Splattering
Painting Acrylics with Plastics
Marble comes in a variety colors in just one piece and each of those colors are random in placement – there can be swirls, spots, blotches, stripes, and streaks. No two areas of a piece of marble are the same.
In wood painting marbleizing is a very messy, sloppy, but really great fun technique. Before you try this style of coloring please get a good set of latex gloves and lots of paper towels!
Supplies:
Acrylic craft paints –
titanium white
Wedgewood blue
Nutmeg brown
Carbon black
Artist oil paints –
cobalt blue
hooker’s green
carbon black
titanium white
several palette paper plates
mixing bowls for the oil paint
turpentine
linseed oil
latex gloves
lots of paper towels
old toothbrush
deep disposable container
ice cold water
1″ x 1″ x 4″ basswood block
220-grit sandpaper
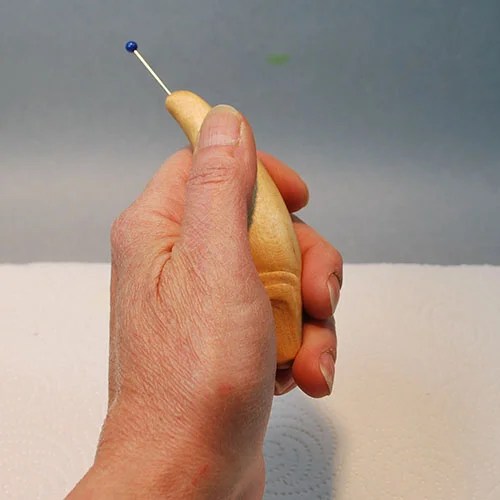
ball-head straight pin
 Step 1: Carve your Whittle Fish body from a 1″ x 1″ x 4″ basswood block using a bench knife. Sand well using 220-grit sandpaper for a very smooth finish. Wipe the sanding dust from the wood using a soft, clean cloth.
Step 2: Pre-treat the Whittle Fish by burnishing it with a wooden spoon or scrap block of poplar or pine to a bright sheen. Firmly insert a ball-head straight pin in the tail of the body for easy handling.
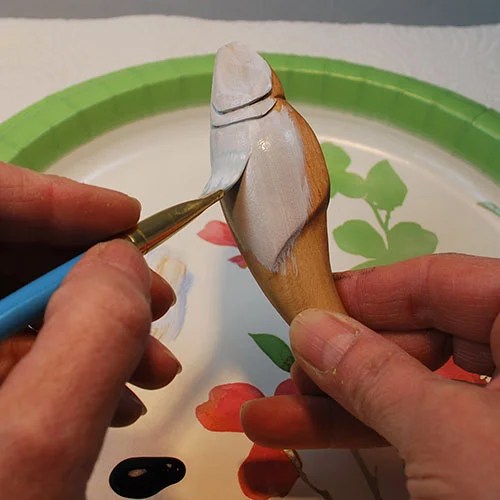 Step 3: Primer coat the body using a multi-colored base coating of titanium white, Wedgewood blue, and nutmeg brown. Note in the photo that the burnished surface allows the smoothest application of your base coat colors that you can get. Set the fish aside to dry well – one half hour or nuke it in two 15 second sessions allowing it to cool between nukings.
 SECRET – Using multiple colors in your primer steps, allowing each to create random brush strokes across your project, add to the final look of this painting technique.
 Step 4: Place a medium sized puddle of titanium white on your palette. Put on your latex gloves. Create a splatter box with a cardboard box or fully cover your work area with paper towels.
Dampen and blot an old toothbrush with clean water. Load the toothbrush bristles with white. Hold the fish in one hand and pointing the toothbrush towards your carving pull your thumb across the bristles. This will explode a mist of fine dots all over your carving.
The thinner your paint is the bigger splatter dots you get. So after you do a layer of fine dots add a few drops of water to your puddle of white and splatter again.
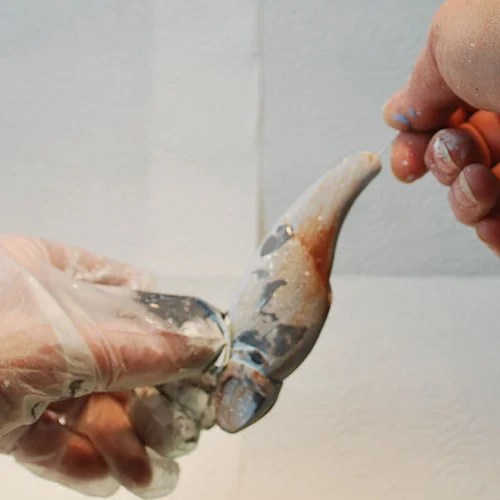 Step 5: To add a few random angular areas of color pull the fingertips of your latex gloves forward a touch, enough to let them wrinkle. Pat your glove-covered fingers in a mix of carbon black and white ( a medium grey tone). Pat on a clean area of your palette. Now grab the fish with those wrinkled, painted coated fingertips.
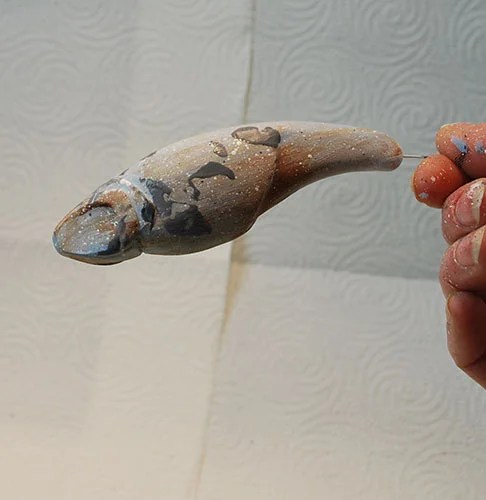 Return your fish to its drying box space and allow to dry thoroughly – at least another half hour.
 Step 6: Prepare the marbleizing bucket or tub by filling it with very cold water. You can even add a few ice cubes if you have a large enough bucket.
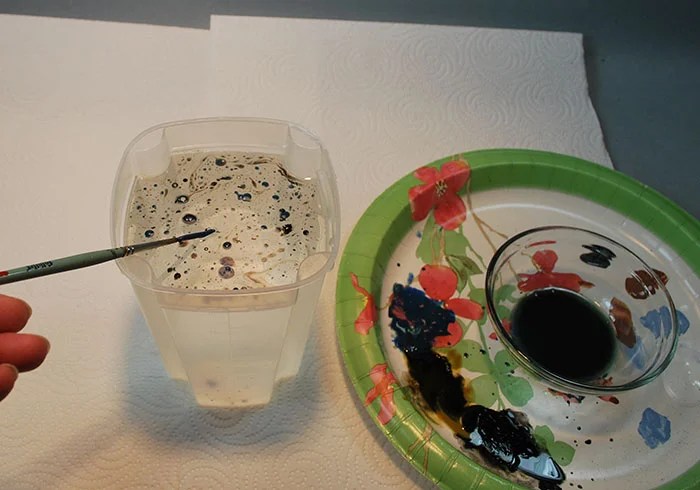
 Step 7: On a clean palette or in small pans mix 1 part oil paint with 2 parts turpentine and 1 part linseed oil. Mix well with an old brush. You want your oil mix fairly thin but not so transparent that you can not determine what color it is. Repeat for all of the dark oil colors.
Generously drop this oil mix for each color onto the cold water but don’t completely cover the water surface … you want a little room between drops to create the swirl effect.
Stir ONCE with your brush handle.
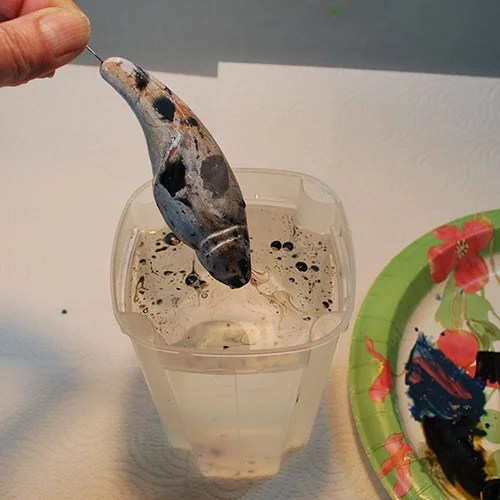
Step 8: Slowly lower your fish into the water container, twisting slowly as you do. Now slowly lift him out of the water. Wah-LA! Instant marble swirls.
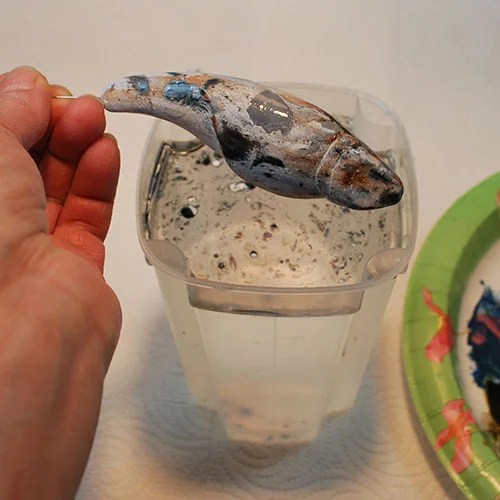 Step 9: Place some paper towel under your drying area, and hang your fish. He will drip for several moments. When the dripping stops remove the paper towels and soak them immediately in soapy water to remove the turp and oil before you throw them in the trash can. Let the fish dry overnight!
SECRET – If you wait just an hour you can re-dip to add new oil color swirls. The first dipping on my fish did not pick up much white, so I added ice cubes to my water then added more white oil mixture.
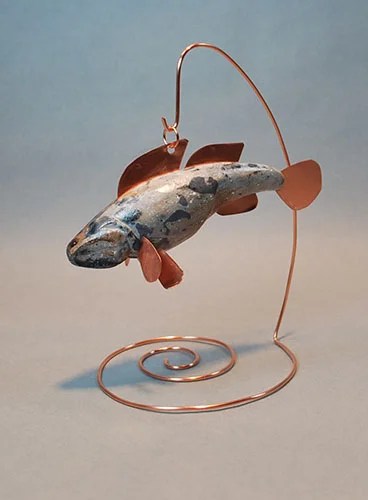
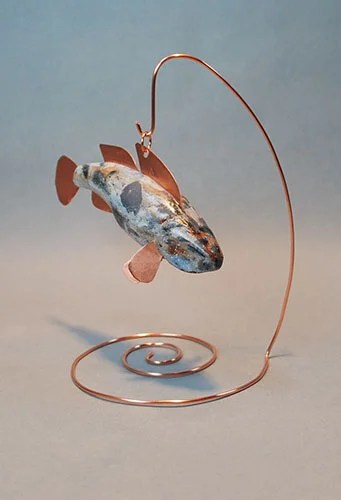 Step 9: After he has thoroughly dried give your fish two light coats of spray sealer. Cut, file, and insert your copper fins. He is ready to display.
- Wood Carving and Burning Painting Supplies
- Paint Kit Supplies
- Steps to Success
- General Techniques used in Wood Carving Painting
- Burnishing your Wood Carving
- Simple Blending with Acrylic Craft Paints
- Acrylics over a Primer
- Simple Dry Brushing
- Dry Brushed Acrylics over Oil Based Stains
- Marbling and Splatter Painting
- China Painting with Acrylics
- Vintage Painting with Acrylics
