Pyrography Feather Border 1
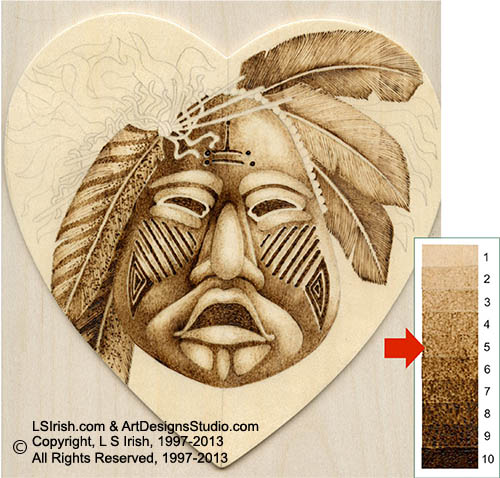
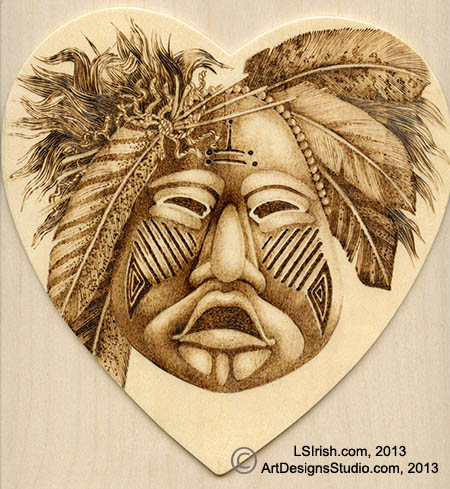
We have spent the w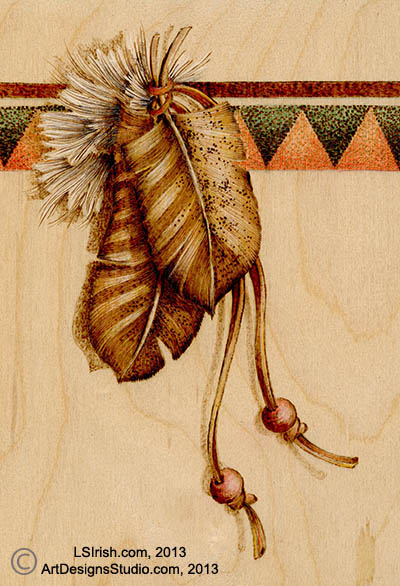 eek working on an in-depth wood burning for the Ceremonial Mask Pyrography project. Today let’s look at a small portion of that project and how you can easily create a feathered border design to decorate a box lid. This Feather Border project will take you through the steps of tracing your pattern, shading the feathers, creating a drop shadow that lifts your pattern off the background, the detailing steps to the feathers and fur, and how to add coloring with colored pencils.
This is a long posting, but I wanted to share this project over just two days. Please, bookmark our blog so that you can return at any time to work through and complete this free pyrography project by Lora Irish.
Supply List:
9″ x 10″ birch plywood board
220- or 320- grit sandpaper
graphite paper
pencil and ruler
variable temperature wood burning unit
ball tip pen
spear shader pen
curved shader pen
masking or painter’s tape
brown paper bag
artist quality colored pencils
gloss or semi-gloss spray sealer
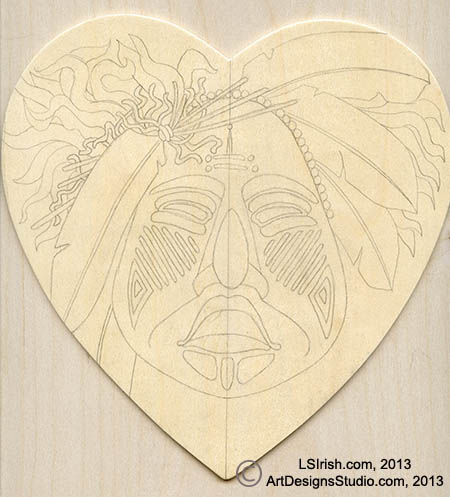
Prepare your wood blank
Lightly sand your wood project using 220- or 320- grit sandpaper to remove any loose wood fibers and imperfections. Sand with the grain of the wood to avoid creating fine swirl scratches that sandpaper can leave. Wipe the wood surface with a dry, clean cloth to remove any dust.
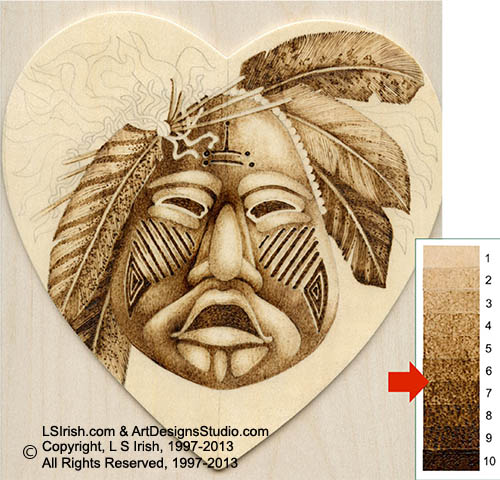
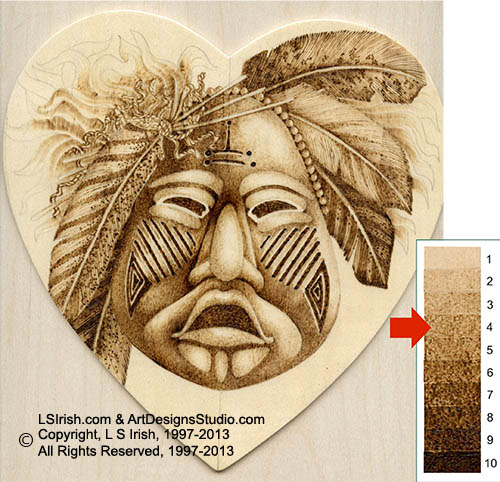
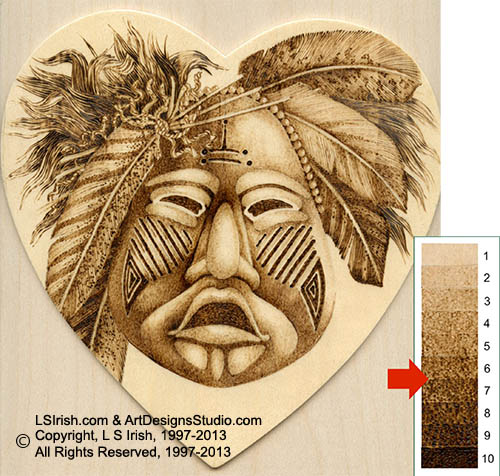
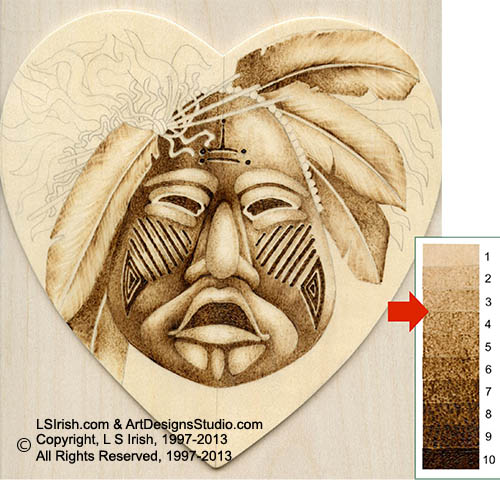
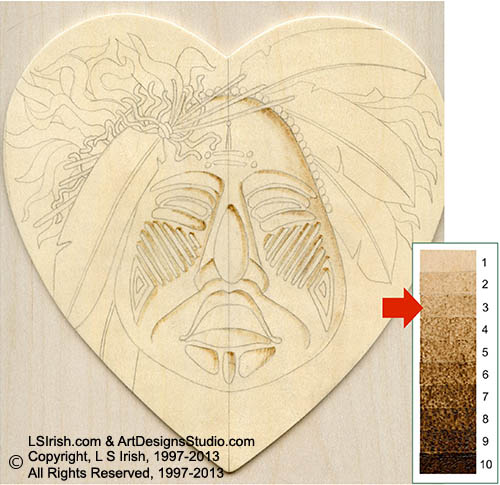
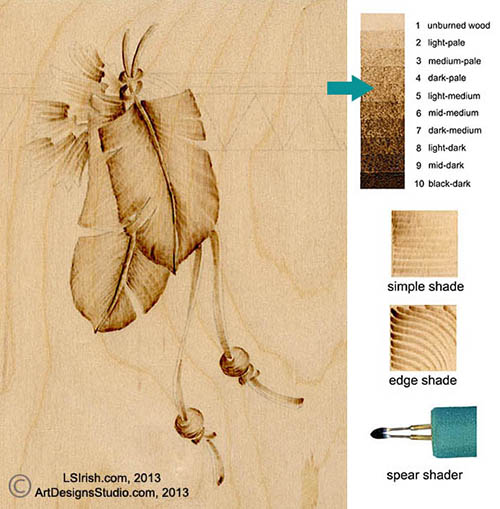
On a scrap piece of the same wood, leather, or gourd media that you will be burning create a sepia practice board scale that is divided into ten units. We will be using that scale throughout this project for the tonal values and temperature settings.
Trace the pattern
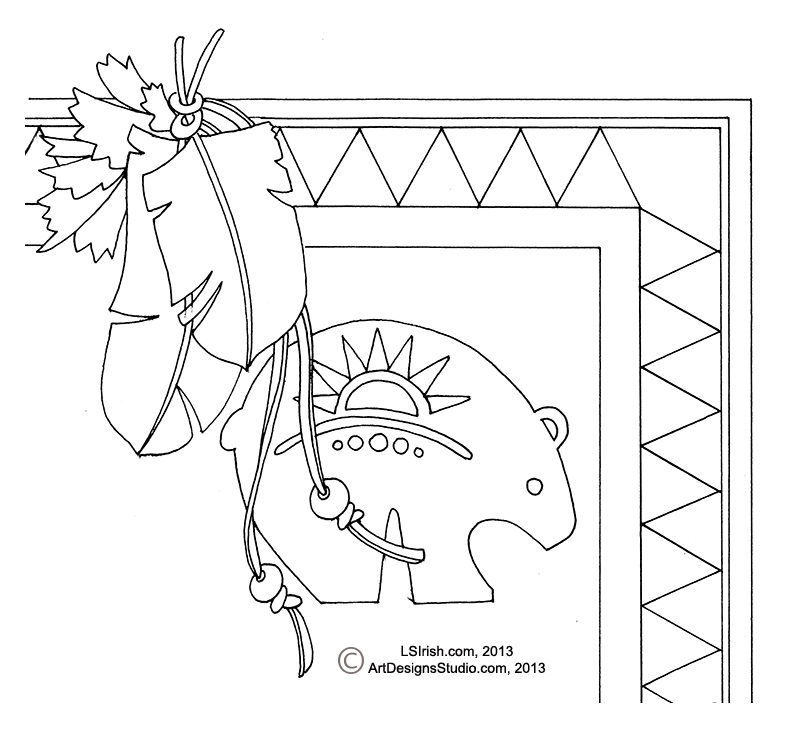
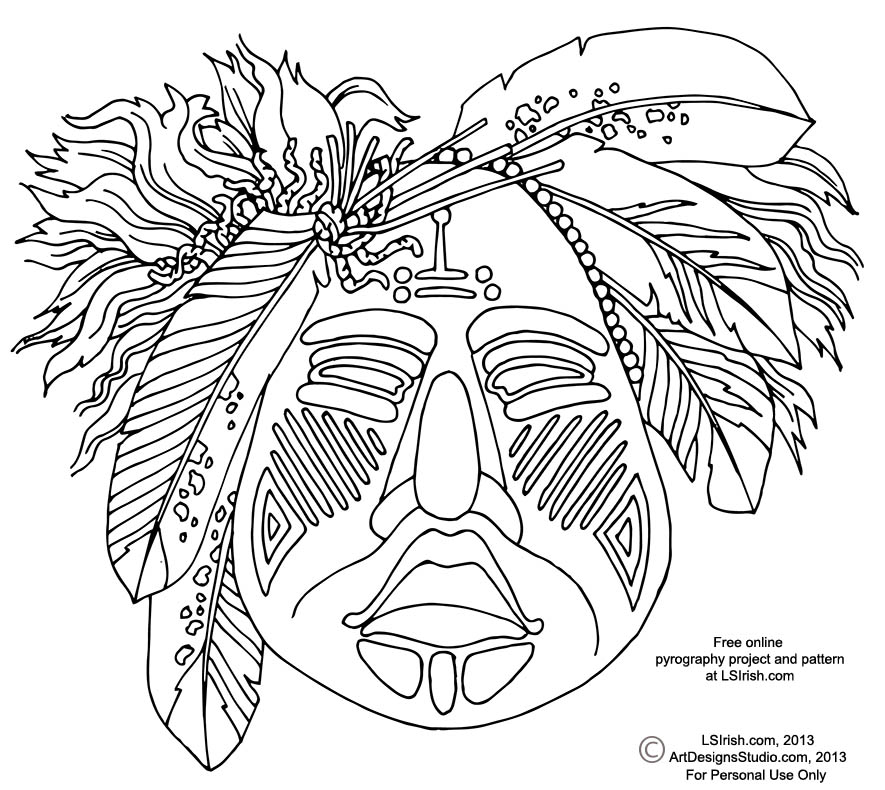
Click and save a copy of this free pyrography pattern by Lora Irish to your computer. Print a copy to use in this tracing step.
Measure the geometric line design on the pattern. Use a ruler and pencil to mark the geometric pattern to your board. This geometric board is a simple 3/8″ thick line, a 1/8″ unburned margin, and a 7/8″ wide line of triangles. A seven triangle repeat measures at 6 3/8″ on the inside edge of the board.
Center the paper pattern to your board and secure one edge with masking or painter’s tape. Slide a sheet of graphite tracing paper under the pattern and trace along the outlines using an ink pen. Check that you have all lines transferred and remove the pattern paper and graphite paper.
Wood Burning Step 1 – Shaping the feathers
Click on any of the project images for a large image that you can save to your computer.
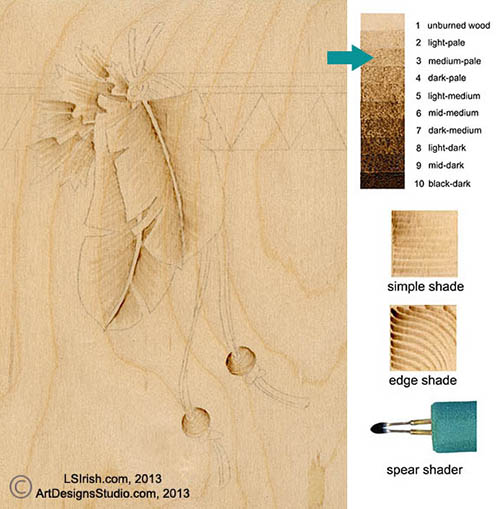
The first step for our feather border is to create the basic shape or curve of the feather. This step uses a spear shader, the long pull stroke, and a tonal value setting for medium-pale. Each side of the feathers is an upside-down cup. From the center feather shaft the feather side curves up to the center line of that part of the feather and then drops down to the outer edge.
Begin your spear shader strokes at the feather shaft and pull towards the central area of the feather in a long, curving line. The stroke will naturally be darkest where you begin your stroke and fade into a very pale tone as it nears the mid-portion of the feather side.
Use the spear shader and the long pull stroke to work long lines into the fur clusters at the top of the feathers. This shading is worked where one cluster of fur tucks under another and is pulled from the tucked point of the cluster towards the outer edge of that cluster. Again, allow your stroke lines to curve.
The beads are shaded along the sides, working towards the center of the bead using the long pull stroke and spear shader.
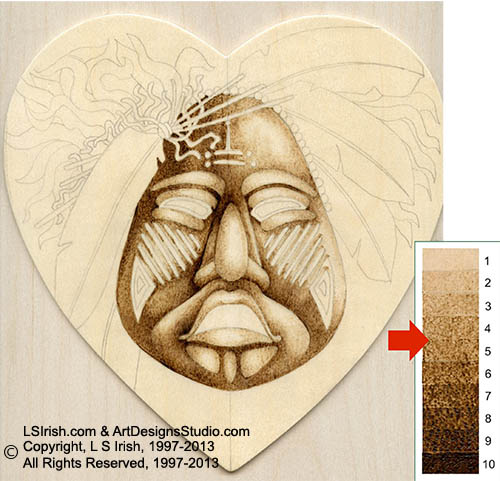
Wood Burning Step 2 – Shading the edge of the wood burned feathers
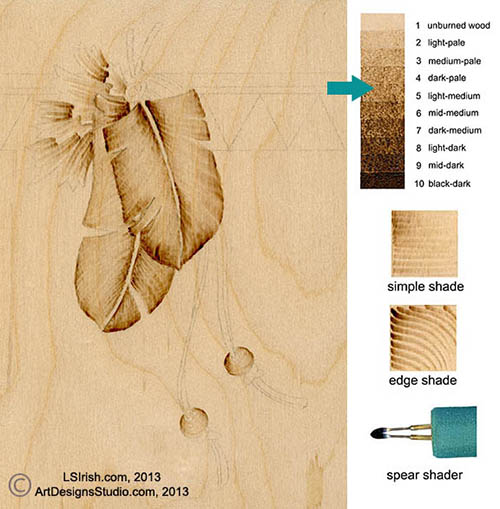
To curve and shape the outer edges of the feathers use the spear shader on a slightly hotter temperature setting for a pale-medium tonal value. Place the side of the spear shader against the outer edge pattern line and burn long pull strokes that curve towards the center area of the feather side. Match the curve of this series of strokes to the curve of the strokes made in the previous step. Each feather side should now go from dark along the outer edge, gradually fading to a pale or unburned wood tone at the center of the feather side, and then gradually darken as it nears the feather shaft.
Wood Burning Step 3 – Shading the leather strings
Using the spear shader and the long pull stroke, shade the leather strings at the top where they wrap around the two feather shafts, and below the feathers in the beaded area of the leather. The shading is worked from where the leather tucks under either the feather or into the bead, then pulled towards the center point of that section of string. Use a pale-medium to mid-medium temperature setting for this step.
Shade the feather shafts using the long pull stroke. The darkest shadow on the shafts falls on the left side of the feather.
Wood Burning Step 4 – Creating a drop shadow

A drop shadow is worked in the background area of the design and pushes your elements visually off the wood. This step creates those drop shadows on the left side of the feathers and leather strings. They are created with the ball tip or looped tip pen, a pale-medium tonal value, and either a solid-fill stroke texture or a tightly packed scrubbie stroke.
Drop shadows are never darker than the tonal value of the area that is creating them. As we develop the feather in the next few steps you will see that the outer edge of the feather will have a tonal value about two steps deeper than the shadow we are now creating. Please refer to the finished pyrography project at the top of this post.
The wider the drop shadow, the farther from the background your element hangs. Narrow shadows place your element close to the background. Note in the image the point on the far left feather shadow and the point on the actual feather. The space between these two points defines the distance that the actual feather is from the background wood. This space is a visual measurement or reference.
The amount of air space between the shadow and the element defines the distance of the element from the board. The leather strings hang free – do not touch – the background. We know that because the shadow does not touch the leather string. The beads do touch, lie against, the background. We know this because the shadow touches the bead and is only a partial circle, not a full shaped shadow. In the feathers, returning to the left feather point, we know that this feather does not touch the background because the two points – feather and shadow – are so far apart.
Tomorrow we will begin the fine detailing in the feathers and creating the fur clusters.
Thanks for reading – Lora Irish