
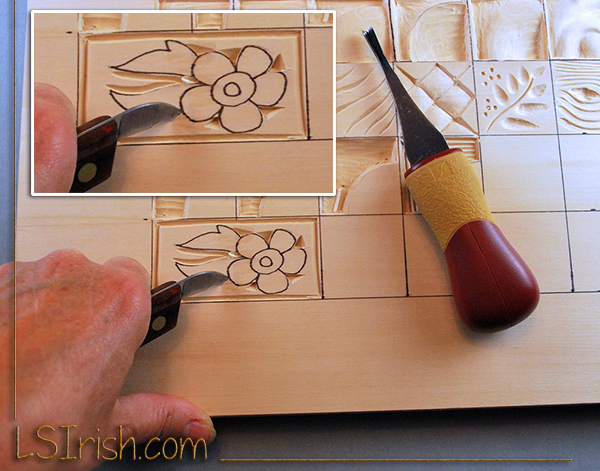
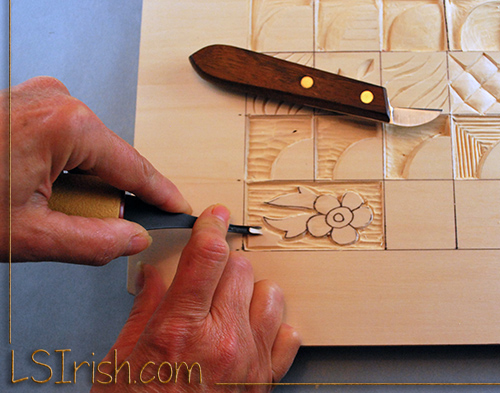
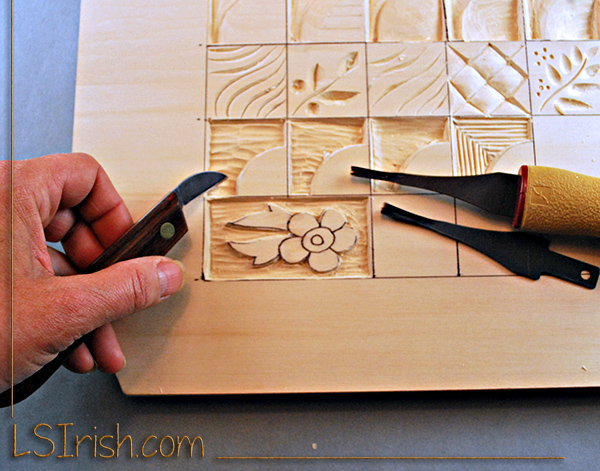
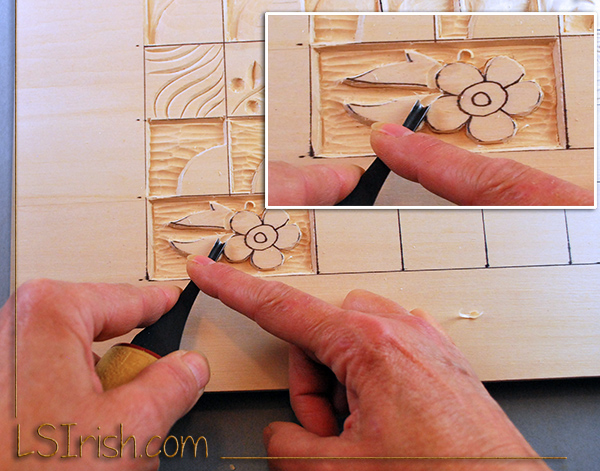
Wood Carved Ice Fishing Decoys
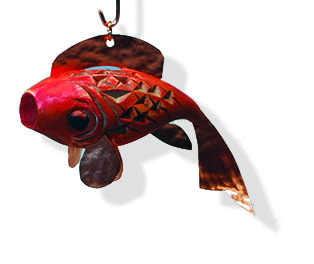
During the America Depression ice fishing decoys were a major way to put food on the table. Today they are a fun, delightful carving subject that lends themself to brilliant coloring. This post will look at a coloring/painting technique called Rouging, as shown on our middle red-orange metallic goldfish.
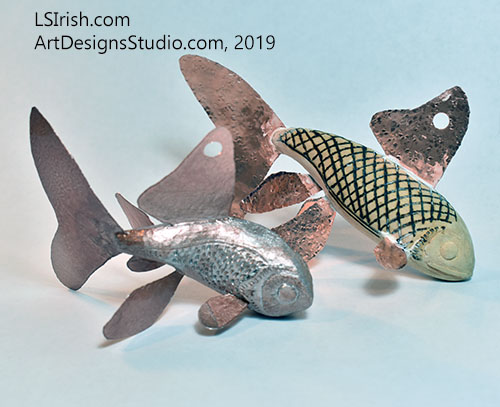
Below are three samples of ice fishing decoys, all worked off the general body shape of a comet goldfish. Measuring between 6″ x 4″ to 7 1/2″ x 4″, worked in basswood, the top fish is sprayed with a copper metallic finish. Our second fish has been roughed using oil paints and linseed oil over the same copper metallic, and the bottom fish is painted using craft acrylics over a lime green spray base.
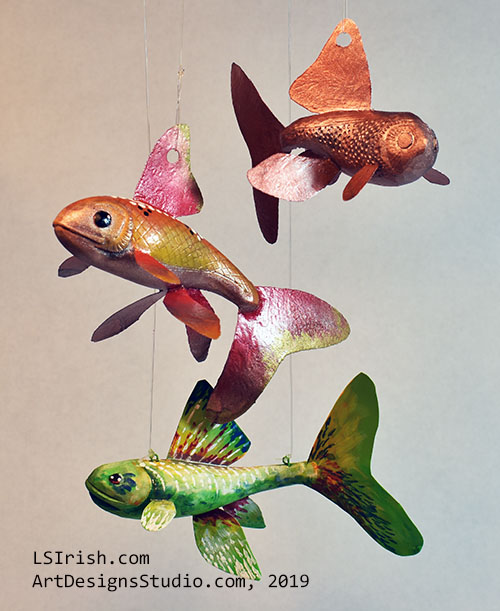
Ice decoys were made from what ever materials the carver had on hand. A scrap of wood, maybe an old license plate or piece of scrap metal for the fins, and roofing nails for the eye; these decoys are a major part of American folk art.
My carved samples are worked in basswood for the body shape. The fins are cut from 30 gauge copper sheeting, which can easily be cut using a pair of craft scissors.
To insert the fins into the body I use my shading tip of my wood burning tool on my hottest temperature setting to literally burn a thin trough into the decoy. While I have my burning unit on the table I can add small details to the body as scales, center lines, and even cross hatch patterns.
Remove any burned dust from your fin troughs then insert and set the copper fins with super glue. To fill in the small gap between the burned trough and the metal fins I use Liquitex Modeling Paste – an air-dry polymer mixture that dries extremely hard without shrinking. You can see the white line of modeling paste between the top fin and body, below.
After the decoy was thoroughly dry, sanded and dusted, I gave the fish two light coats of copper metallic spray paint. Allow that primer layer to dry for several hours. I used t he spray paint as my base to avoid any brush strokes that might come from a hand-brushed primer.
Rouging is worked over a heavily antique project or a metallic base using artist oil paints, boiled linseed oil, and gloss acrylic spray sealer.
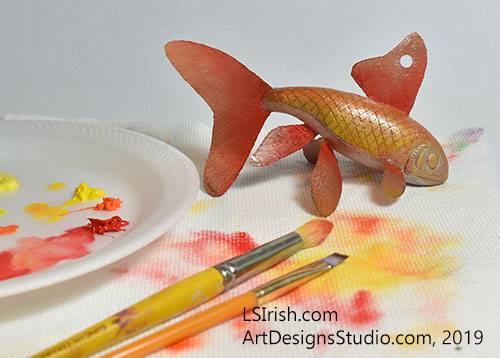
Place a small amount of each oil paint on a palette – I am using lemon yellow, cadmium yellow, cadmium orange, and cadmium red. Oil paints are transparent colors that have no white, black, or gray base. So as we work the color of the paint will clearly allow the color and sheen of the metallic spray to show through.
1 Lightly dampen your ox-hair brush in boiled linseed oil. Blot as much of the oil off the brush as you can. Next, pick up a very small amount of color on your brush tip. I like to rub the color into the tip on the same area of paper towels as I just blotted the oil from my brush.
2 Gently rub one coat of linseed oil thinned color onto each area of your project. I use a circular motion where the brush just barely touches the fish … just like applying your make-up rouge. You should barely be able to see any color application with this first coat. Let the oil paint dry for about 15 minutes.
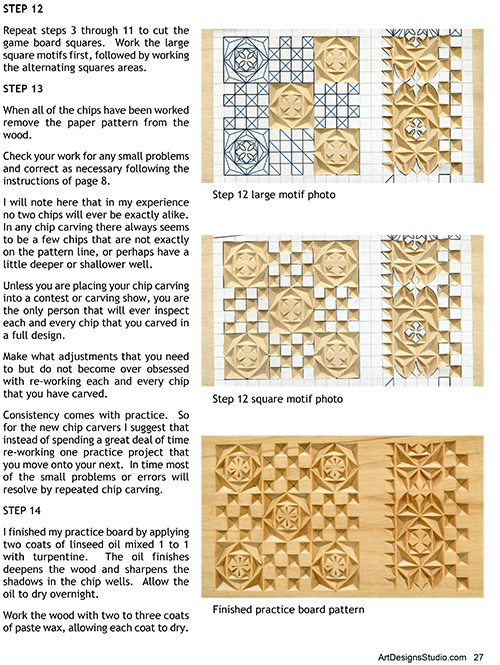
3 Now, give your fish a light coat of gloss acrylic spray sealer. Let the sealer dry for about 1/2 hour.
4 Repeat steps 1 through 3 over, and over, and over again. And now repeat some more.
With each repeat you add an extremely thin layer of transparent oil color followed by a layer of gloss shine all on top of your metallic base. The decoy below has about 8 to 10 coats at this stage.
The finished technique gives you this deep layering of bright color, sparkle and shine, that also allows the metallic sheen to come through the work. This is similar to Chinese lacquer ware or enameling, in its effect.
For a little contrast I did add solid acrylic black eyes, black and white dots along the spine, and a little splatter of metallic gold paint to the fin ends. With one last coat of gloss spray sealer this little bit of folk art is ready to hang.


