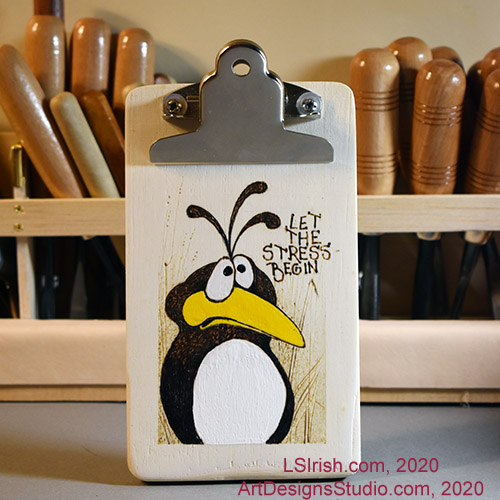
This little “Let the Stress Begin” Bird Pattern for pyrography and wood carving is worked on a mini-clipboard that measures 6 1/2″ high by 4″ wide. The outer 1/2″ edge of the clipboard was covered with painter’s tape after the pattern was traced. This protects that area of wood from being burned and when it is removed you have a clean, straight-lined border.
This is a simple silhouette burn on a high setting for your wood burning tool for the bird’s outline and body fill. The background grass was worked using a ball-tip pen on a medium temperature setting.
The white and yellow were added after the pyrography was completed using acrylic craft paints. After they dry finish your wood burning using your favorite spray sealer.
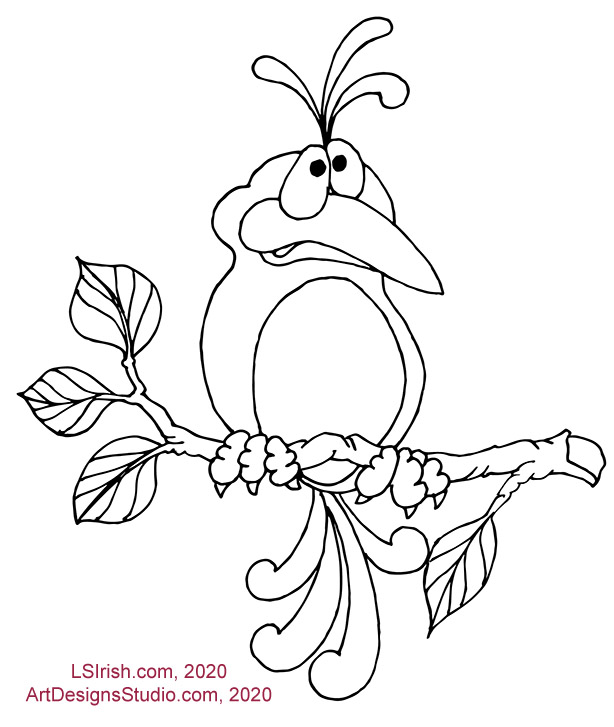
Please click on the image above to open a new window with the full-sized – 7″ x 10″ – pattern.
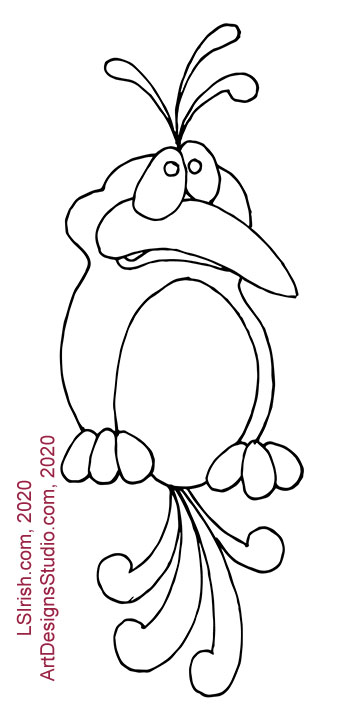
Please click on the image above to open a new window with the full-sized – 7″ x 10″ – pattern.
In wood crafting – wood carving and wood burning – patina is the natural color change that any wood surface goes through with age because of oxidation. This darkens the wood because the iron in the wood begins to rust over time. A clean, fresh piece of white pine will turn into a deep golden-orange color as its patina develops.
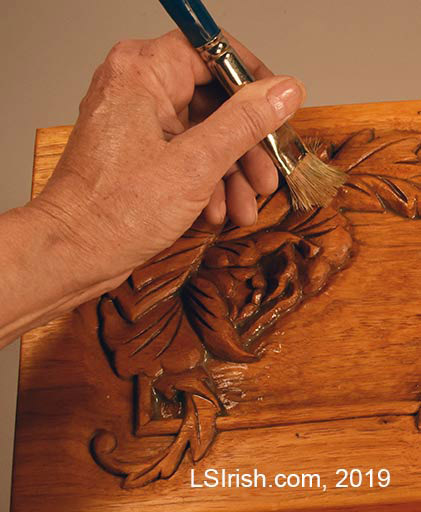
This morning I have been taking photos for my next book with Fox Chapel Publishing and needing a backdrop I grabbed one of my very first relief carvings – a photograph box. But even before I got it to the photography table I knew that carving desperately needed a good cleaning. What I am posting is the same procedure that I use of my wood burnings.
Because we display our carvings, handle our carvings, and use many of them on a daily bases our artwork does begin to pick up an ugly layer of common household dirt that both dulls the surface finish and begins to fill in that fine detail carving that you worked so hard to achieve.
This project was carved in butternut, circa 1995, and used in my first book Classic Carving published by Taunton Press. Over the twenty years of being used as either a jewelry box or photo box, the lid had become quite dingy.
Note here, this is not some precious 200 year old antique … at least not yet!
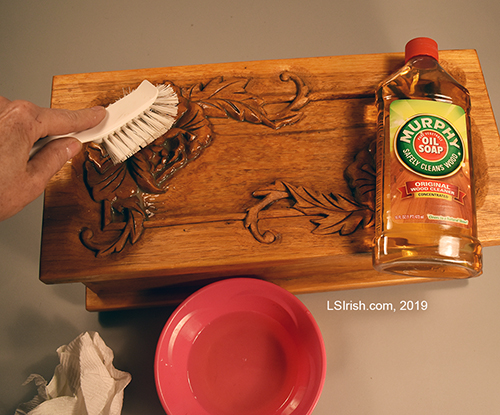
I use Murphy’s Oil Soap. Murphy’s is a concentrated wood cleaner that is safe to use around children and pets. Not only can it be used on raw wood but also over most of your polyurethane or acrylic sealers. Remember to do a small test on the bottom of your project before you work the carving.
Dust your work well before you begin. Use condensed air to clean what you can out of the deep details.
Mix about 1 cap of soap with 1 1/2 cups of warm water.
With a kitchen dish washing brush, work one coat of soapy water over the surface of your carving. Let the soap mix sit on the wood for a few moments so that it can loosen the dirt.
Gently scrub over your carving or burning with the kitchen brush to lift the dirt.
With a large ox-hair brush, work the puddles of dirt out of the crevices and corners.
Use a clean, lint-free cloth to rub away the dirty soap. You do not need to or want to rinse your work after you have wiped the wood. The oil in Murphy’s will refreshes your wood surface.
Repeat if necessary.
After my jewelry box thoroughly dried it was ready to be returned to my dresser as my family photo box. The shine you see on the box edges and carving curves directly comes from Murphy’s Oil Soap.
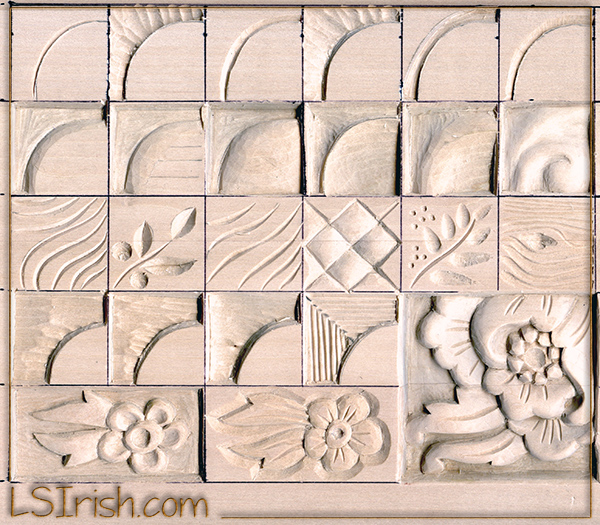
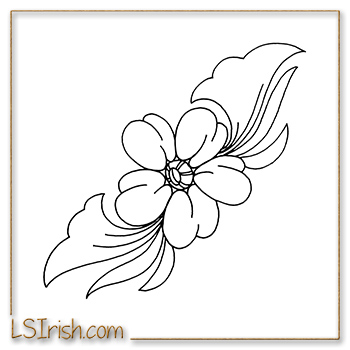
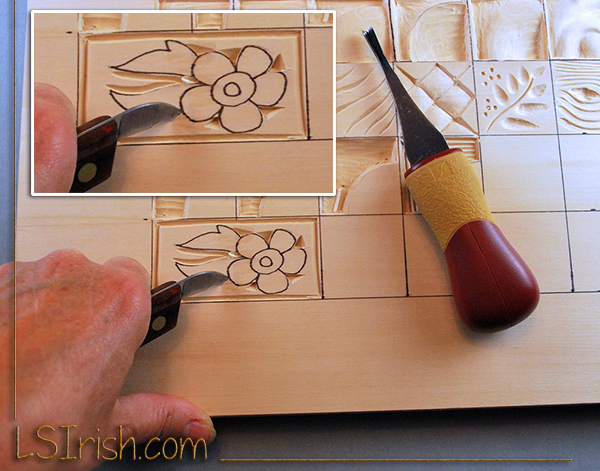
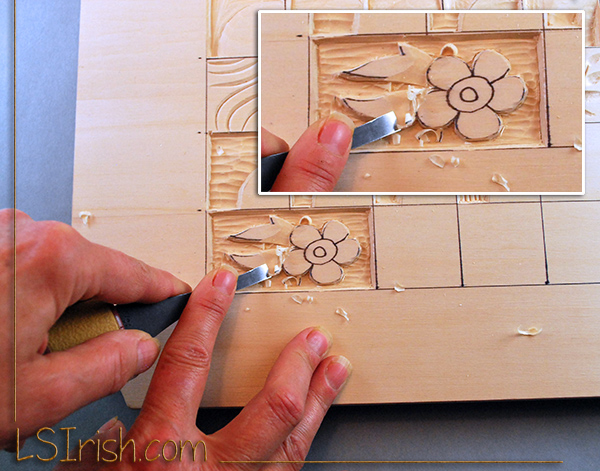
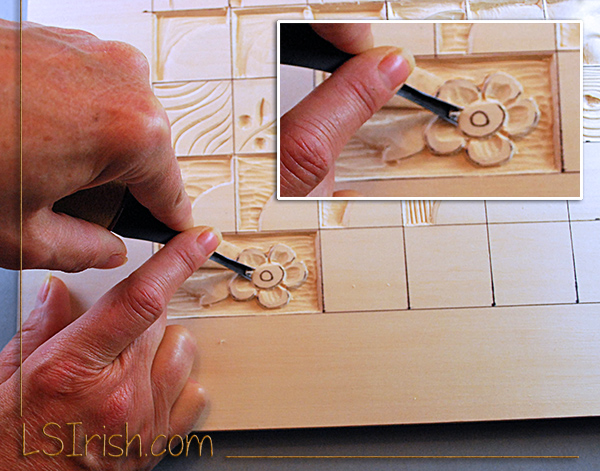
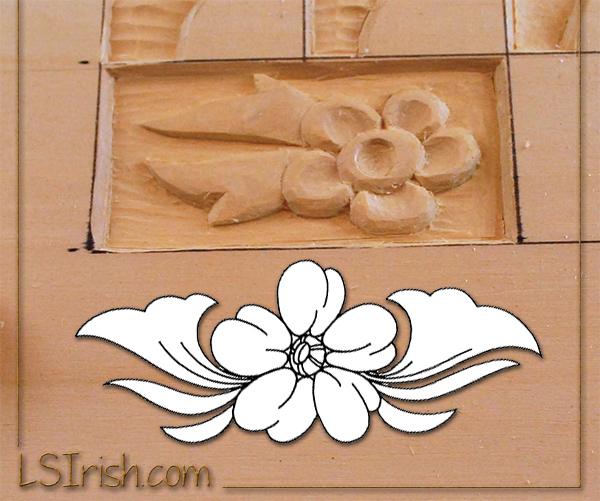
This simple flower wood carving is worked from the practice board project in Relief Wood Carving Workshop by Lora S. Irish. This practice board, which includes 22 specific techniques for relief wood carving and 3 small flower designs, allows you to learn and explore the cutting strokes each of your wood carving tools creates.
PRACTICE CARVING ONE This super simple flower pattern will walk you through many of the basic techniques learned in this practice board chapter.
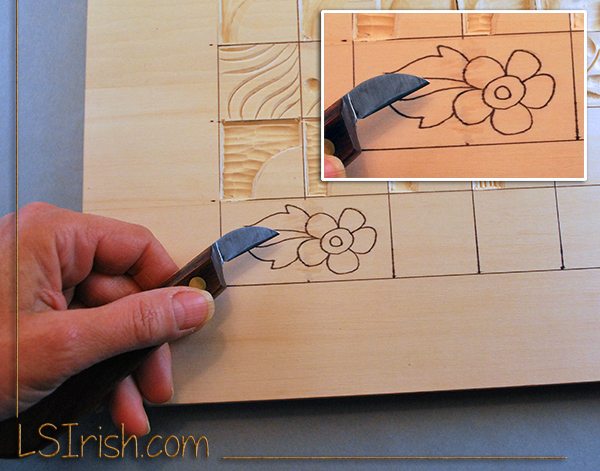
Step 1 Trace your pattern to your practice board using graphite paper.
Step 2 Create a bench knife stop cut along the outer edges of the pattern. Cut triangular chip cuts in the background corners of the petals.
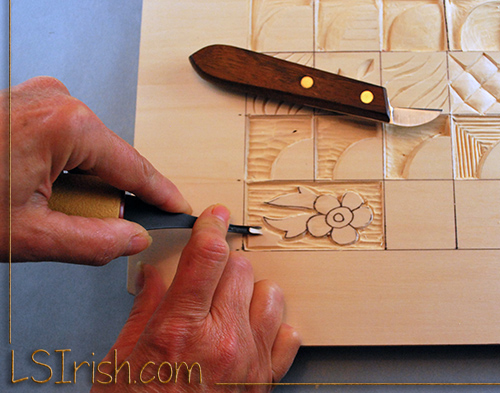
Step 3 Working with the grain of the wood rough cut the background using a medium round gouge.
Step 4 Rough cut the background to a depth of 3/16”, making straight outer walls on your design elements.
Step 5 Create a stop cut using your v-gouge between the leave elements and the flower petals.
Step 6 Using a straight chisel taper the base of the leaf into the flower petals. Taper the outer leaf point away from the flower. This gives the leaves a convex curve.
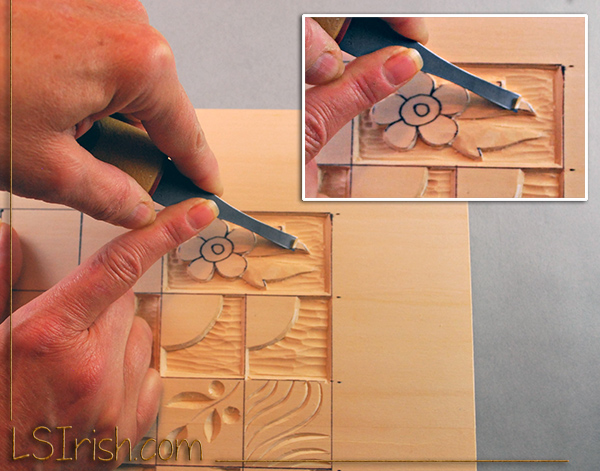
Step 7 Taper the long sides of the leaves towards the background using your straight chisel.
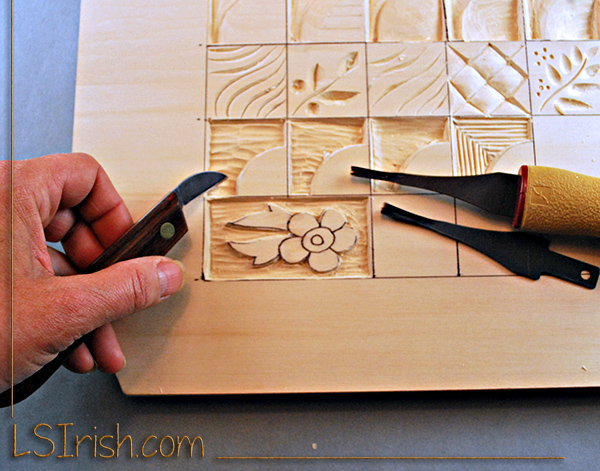
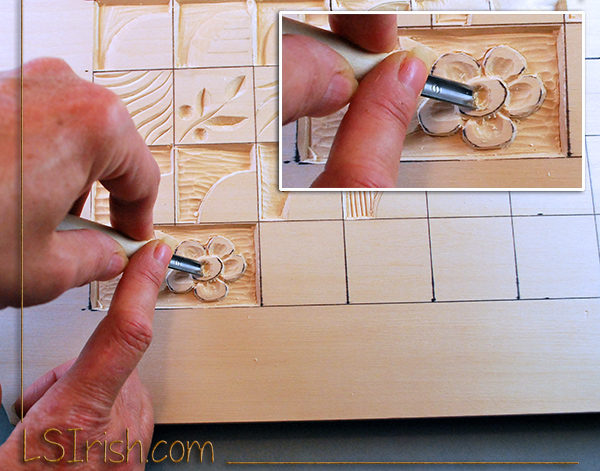
Step 8 V-gouge stop cut the center circle of the flower.
Step 9 Using a medium round gouge or medium u-gouge create a concave indent inside of each petal.
Step 10 Separate each petal using your v-gouge and a stop cut.
Step 11 Up-end a medium or large round gouge to cut the inner circle of the flower center.
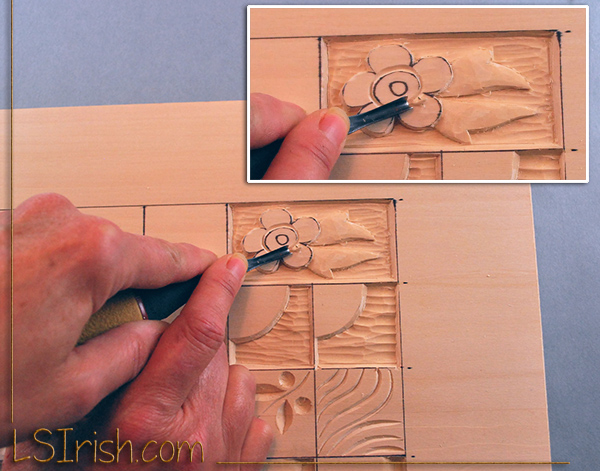
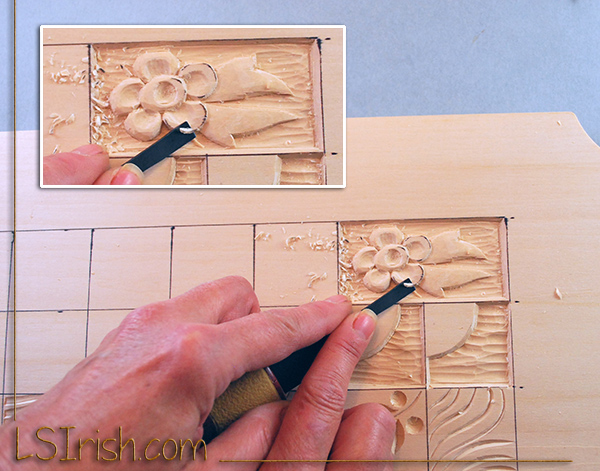
Step 12 Using your straight chisel round over the outer edges of the petals.
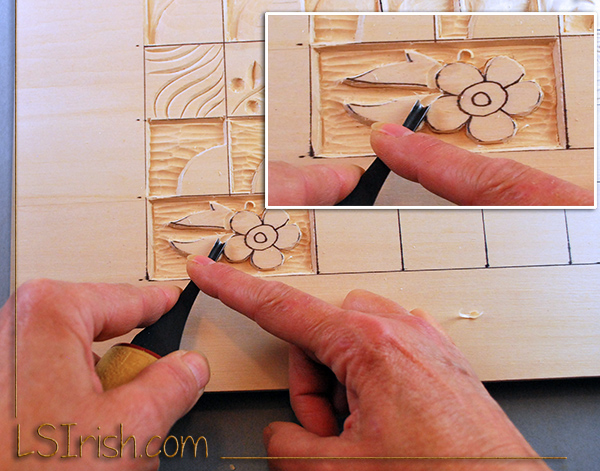
Step 13 Smooth the carving by shaving each element – leaves, petals, and flower center. Re-cut the intersection joint lines between the elements and the background.
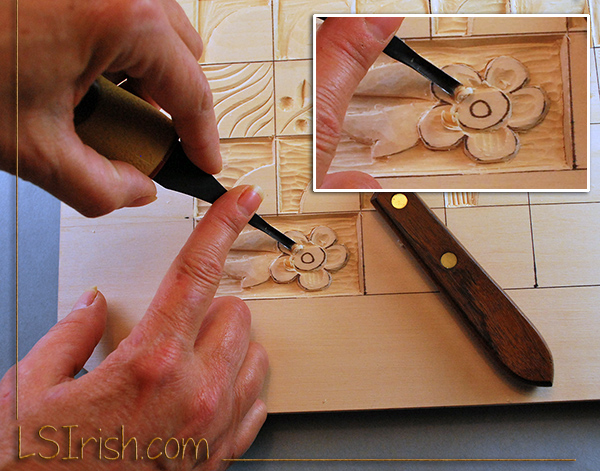
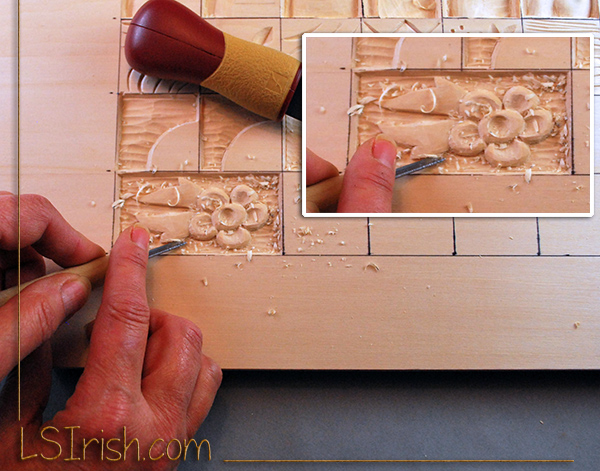
Step 14 with a few more cleaning cuts and a touch of sanding using 220 grit sandpaper this carving will be completed and ready for either the painting steps or the finishing steps.
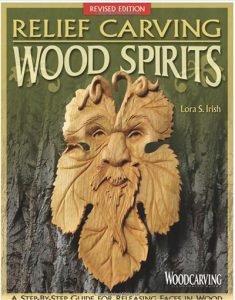
With this book any carver can stand beside the workbench of acclaimed artist Lora S. Irish and learn everything she has to teach about creating an expressive wood spirit. Lora clearly explains the relief carving process from start to finish: every cut, every tool change, and every depth check. The entire craft is here, from preparing the wood to roughing out and detailing the wood spirit to applying a long-lasting finish. No step is left out and no technique is left unexplained. The author shares her tips for creating realistic and detailed facial features like eyelids, windswept hair, beards, and the ever-important mustache. Best of all, when the step-by-step project is complete, Relief Carving Wood Spirits, Revised Edition offers 20 more original patterns to keep any carver busy for seasons to come.
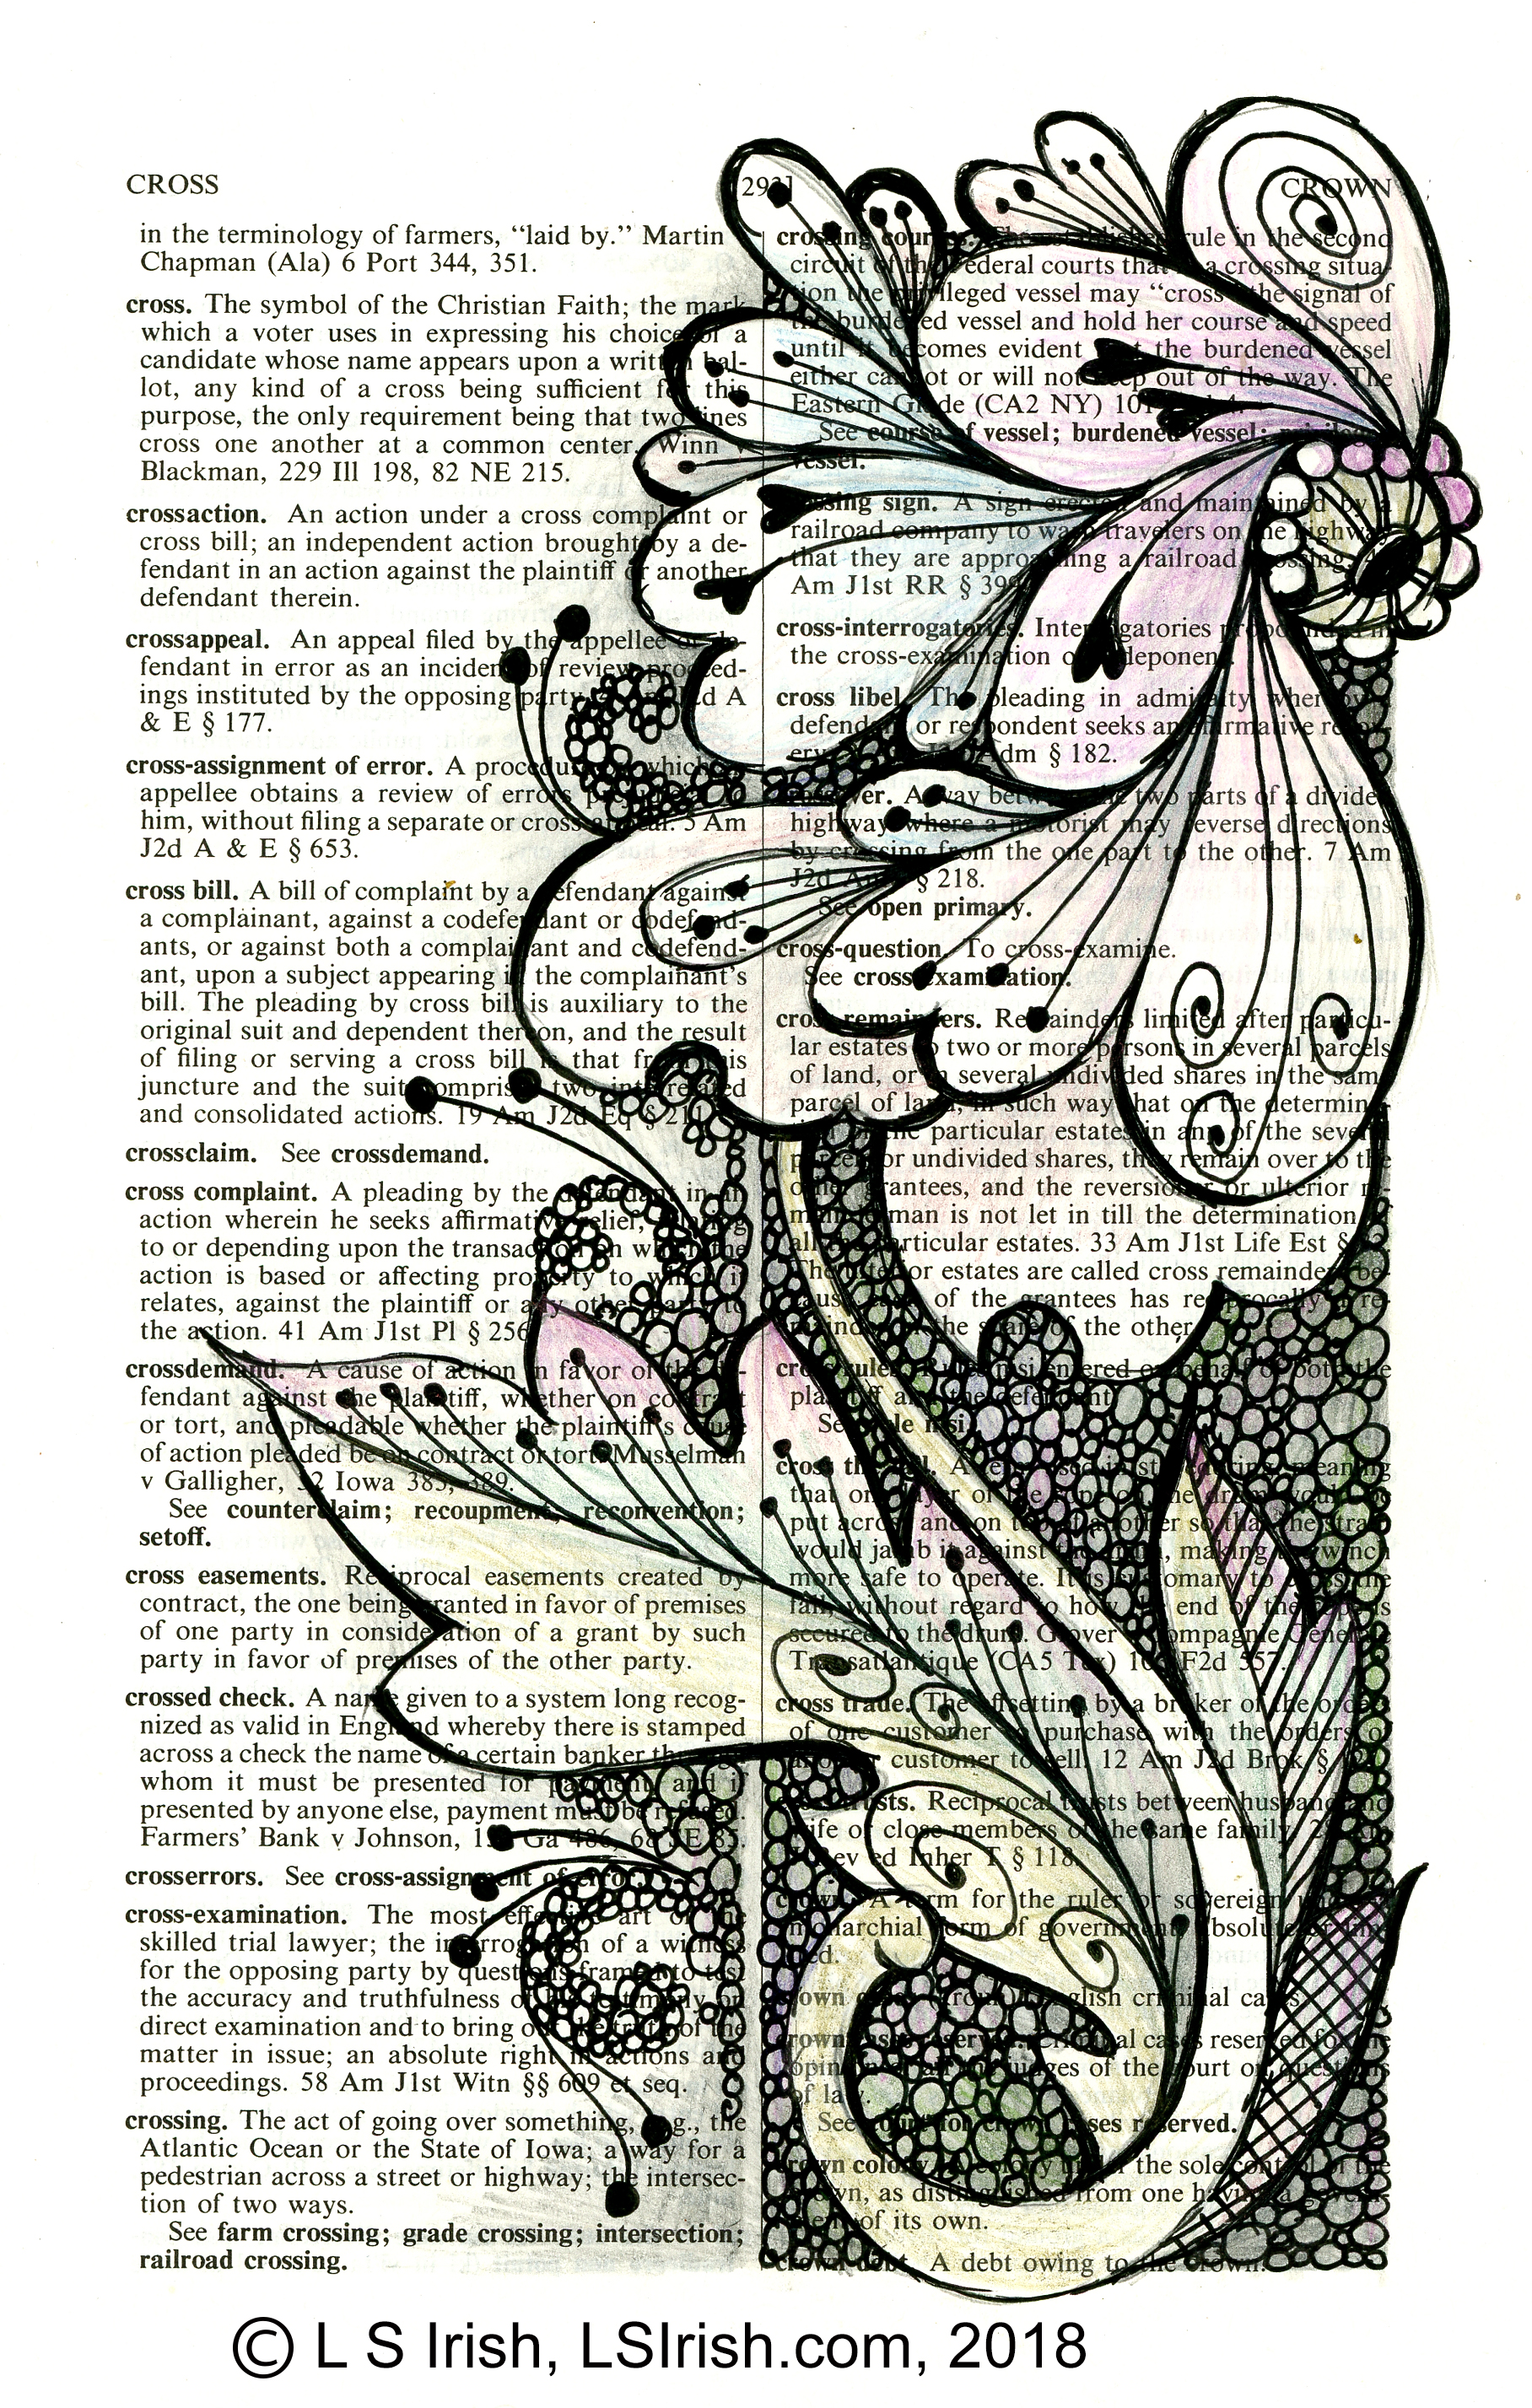
Altered Art is the fun of taking an item as an old book and re-purposing it as the base for your craft arts. The sample to the right is a pen and ink, pencil, and colored pencil drawing worked on the page of an old law dictionary.
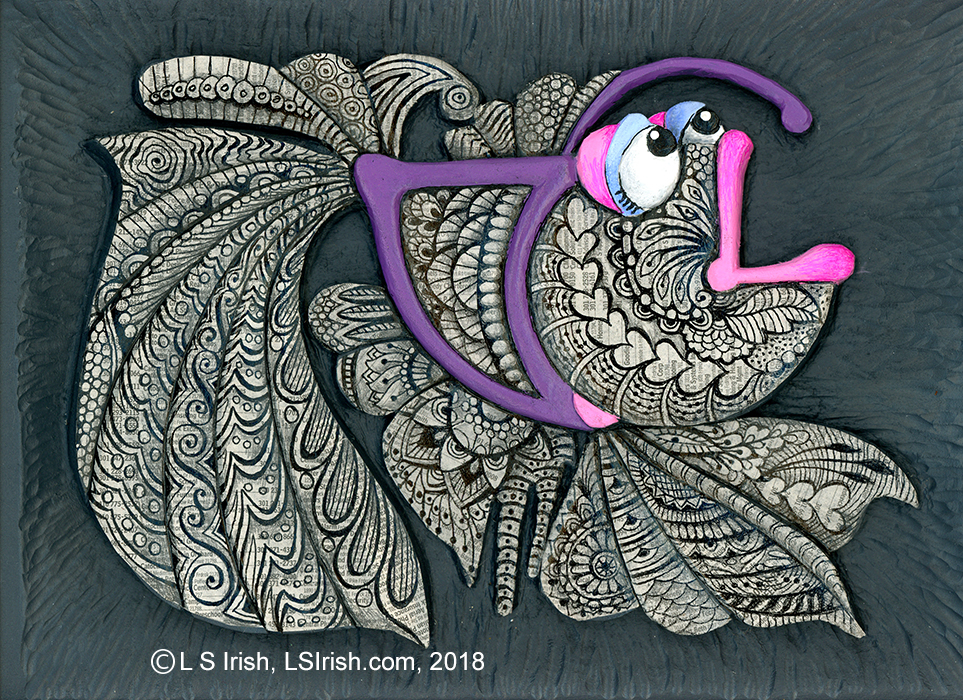
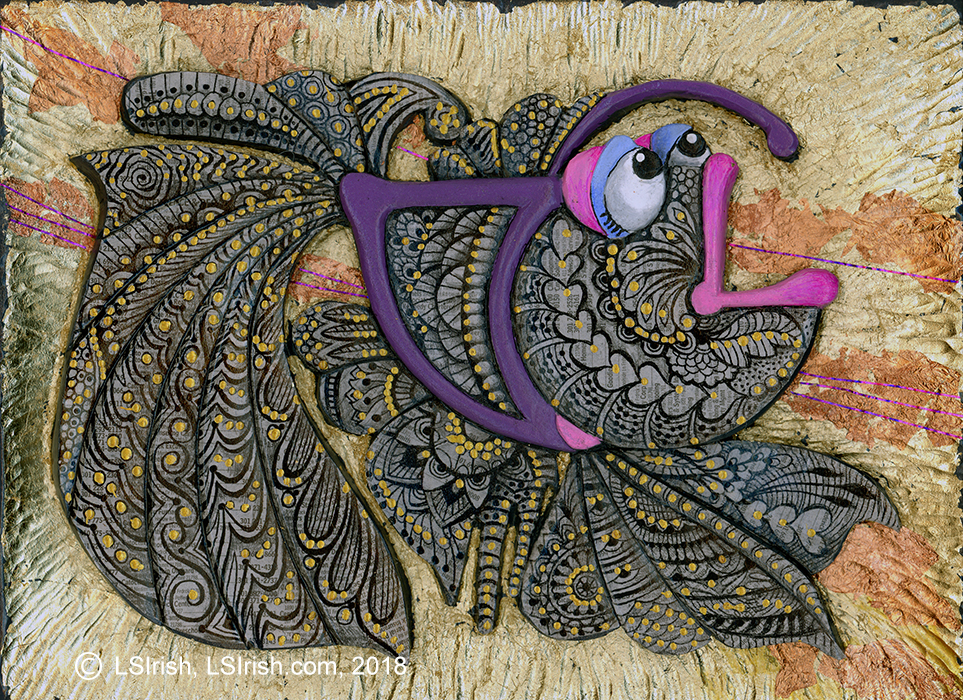
A second interruption of altered art is when we cross-craft by combining multiple crafting skills to create a unique work. In this sample a relief carving becomes the base for decoupage, pen and ink designs, and even gold and copper gilding.