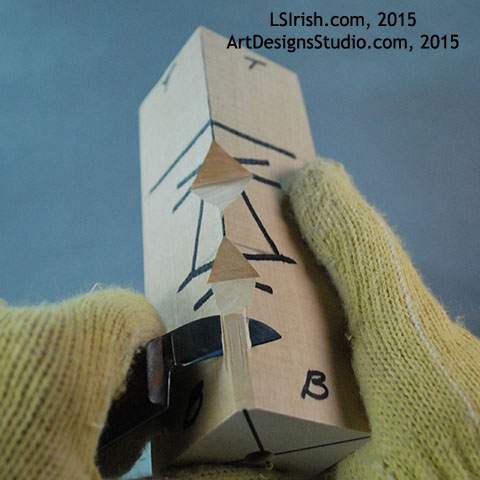
Today we will work through establishing the depth of the nose bridge, the slope of the nose, the division between the nose and the mustache, and freeing the nose from the cheeks.
So, click on the link below and let’s get carving!
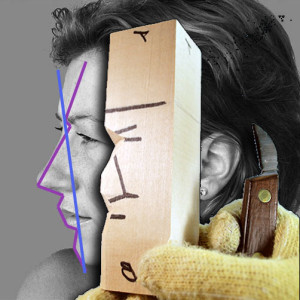
If you are just joining this free, online wood carving project, by Lora Irish, please check out the links below for your supply list and an over view of the planes of the human face.
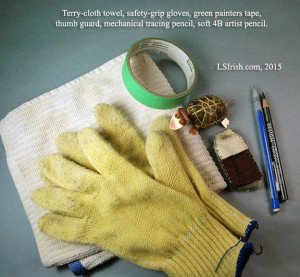
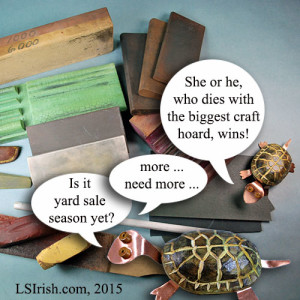
Not sure what tools, knives, or carving sets will get you started in the craft of wood carving, chip carving, and whittling? Are you wondering what general woodworking and craft supplies you might need for your first carving project? Have fun browsing through Lora Irish’s carving kit which includes wood carving beginner sets, sharpening stones and honing boards, rasps, rifflers, sanding and tracing paper, compasses, rulers and t-squares, and so much more!
A basic relief carving or whittling tool set contains far more than just your carving tools and knives. Let’s take an in-depth look at some of the common supplies you may use in your carving craft. All photos in this article are large-sized and labeled, just click on any image to show the full-sized photo.
Plus there are lots of links to Amazon.com, so that you can do a little window shopping as you prepare and plan your own wood carving supply kit.
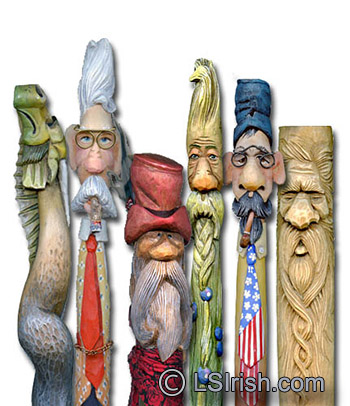
To learn more about Wood Spirit Facial Plane carvings, check out our E-Project – Wood Spirit Mushroom Carving E-Project – which takes you through all of the steps to create the facial planes, plus gives you eight full sized 3D patterns. If you want to focus on the Wood Spirit face, check out Wood Spirit Carving E-Project, which takes you through the face carving as well as how to paint your wood spirit walking stick.
Use our discount code – facebook – for ArtDesignsStudio.com for $5 off that can be used for each Cane, Walking Stick, and Wizard Wands Pattern Packs or E-Projects above. Save up to $20 on your next wood spirit carving project!
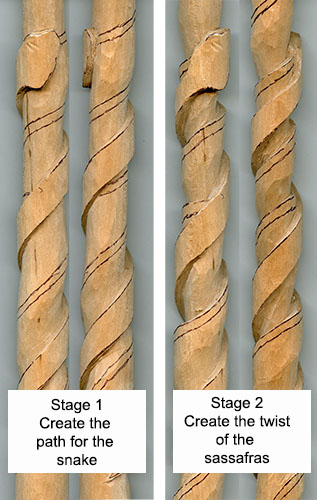
The first stage of this cane carving, today’s work, is to establish the general round shape of the design, determine the path for our snake, and to drop the background area of the cane around the snake. Then we will work to create the path of the twist in the sassafras branch on which he climbs.
Please remember – you can click on any post image for a large photo.
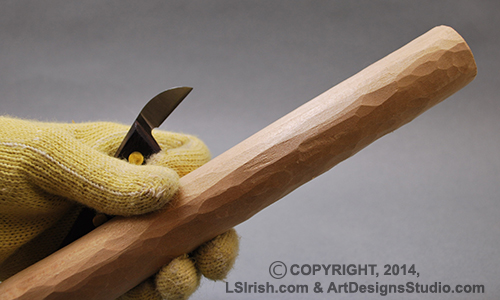
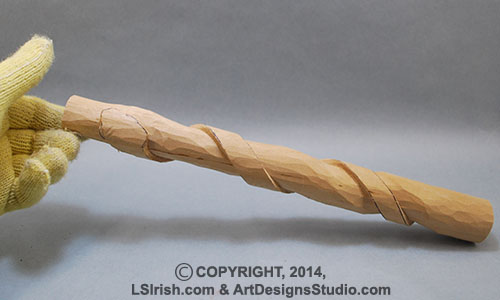
Step 1: Please double check the sharpness and honing of your bench knife. Remember, the most dangerous knife or tool in your kit is the dullest. Use your bench knife and a push stroke to round-over the edges of your basswood blank. Work the cuts from the sharp corner to the center of each flat face of the stick.
A well rounded stick will have all of the original surface area cut. Note in the photo that no area has been left un-worked.
Of note, whether you are a relief carver or 3-D carver, at some point in any carving you want to insecure that you have actually carved all the wood. The milled surface of your basswood blank has a very different texture than the areas that you have cut. After you have added your finish – oil, varnish, polyurethane – that difference will dramatically stand out, making the un-carved areas an eye sore.
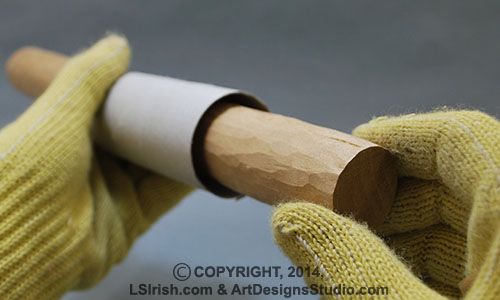
I like to double check my round by comparing the basswood blank to something that I know is a true circle, or close to a true circle. For this project that true circle is the inside of a toilet paper or paper towel roll cardboard tube. By sliding the blank inside the cardboard tube I can check for flat surfaces or planes that need a little more work.
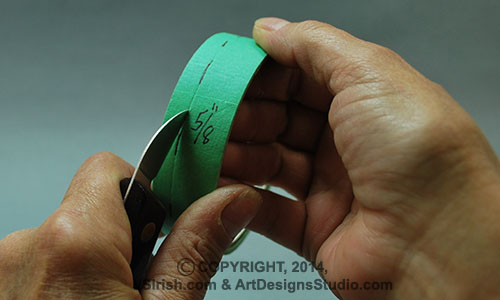
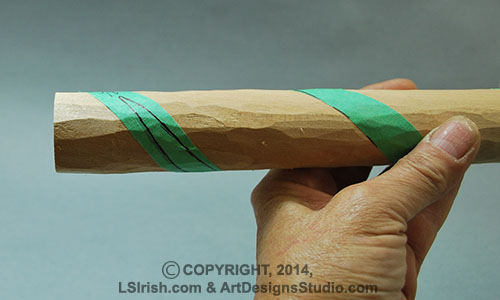
Step 2: To easily create the path of the snake around the basswood blank, I have marked a roll of painter’s tape at 5/8″. For this cane that will be the width of the snake’s body. With your bench knife cut the tape.
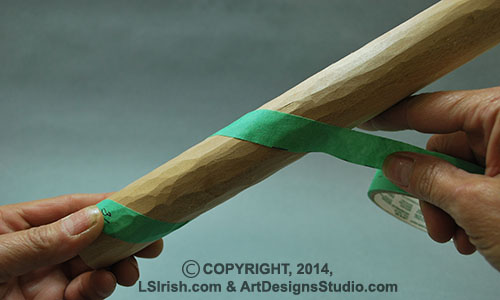
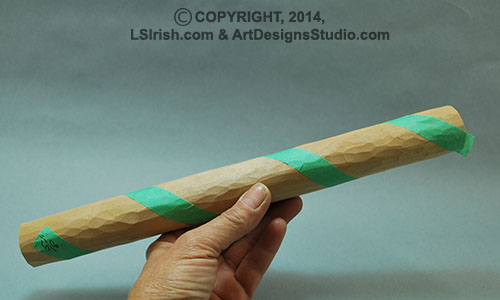
Secure one edge of the tape at the bottom of your stick, and roll the tape around the stick until you reach the top. My tape ran at about a 45 degree or less angle. Looking at the stick with the bottom edge of the tape facing me, I have four wraps, with the last wrap right at the top of the stick.
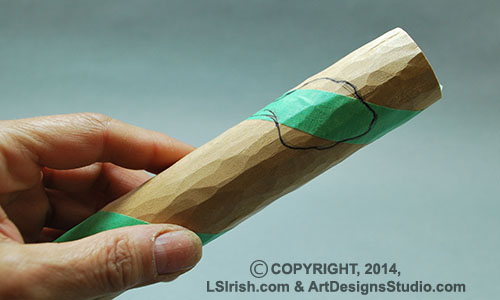
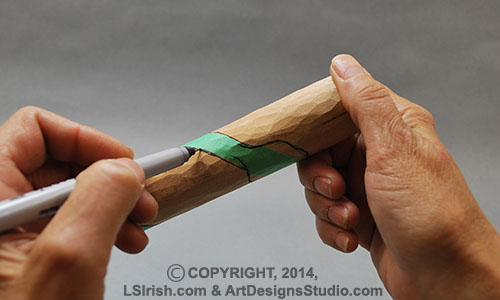
Step 3: Please see the Step 6 for the pattern for the snake head. Using a pencil or marking pen, draw or trace the pattern for the snake head about 1″ from the top of the stick.
Mark two tapered lines for the tip of the tail of the snake onto the tape. Begin the tail about 1″ above the bottom of the stick.
Using a pencil or marking pen, trace along the edges of the tape to mark on the wood the snake’s body lines.
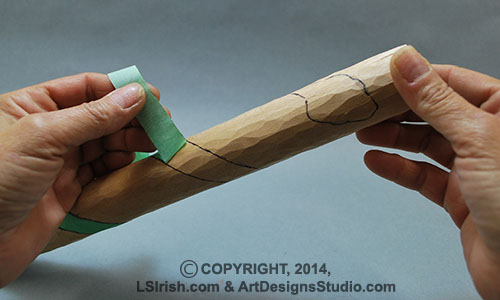
Step 4: Remove the tape. You can re-wrap painter’s tape to the roll and re-use it later for your next snake walking stick or for securing paper patterns and graphite paper to your relief carvings.
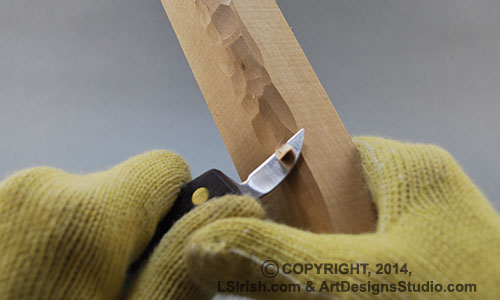
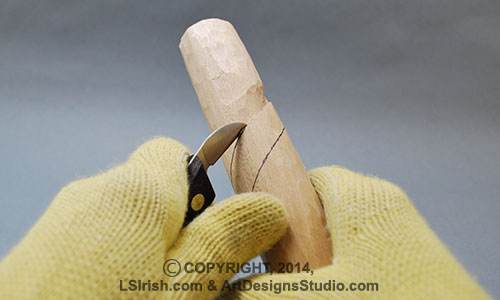
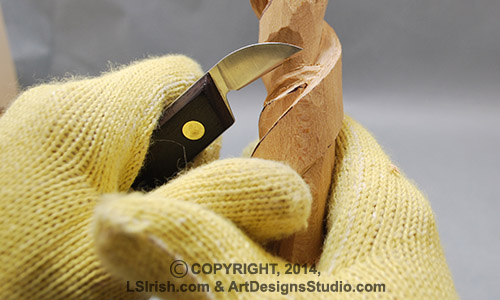
Create a stop cut along the outer edge of the snake body lines, cutting on the marking pen guidelines. A stop cut is made with your bench knife in two separate strokes. First, holding the knife at a 90 degree angle to the wood, cut along the line.
Make the second part of the stop cut by slicing into the first cut, moving from the background area towards the snake body.
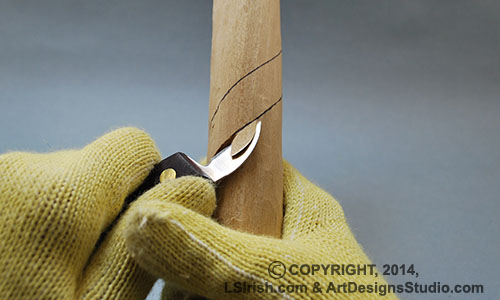
I prefer to slowly drop the background wood in a stop cut area in thin layers or slivers at a time. As you work you can make the first cut slightly shallow, and then make the second background sliver into that cut. Then return to the snake body line and make a new, slightly deeper first cut. Again, work the second background sliver. This will slowly drop the background level of the wood, giving you more control over your depth of work.
Step 5: Continue working the two strokes of the stop cut along both sides of the snake body. The stop cuts are worked about 3/8″ to 1/2″ away from the body lines of the snake. This leaves the center area of the space between the snake twists high or proud. Those areas will become our sassafras twists soon.
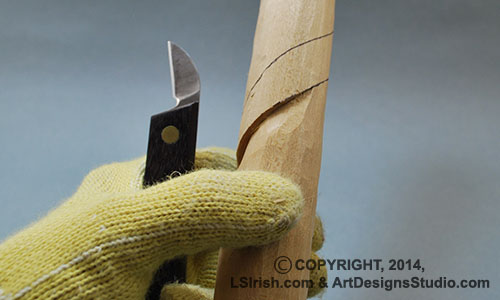
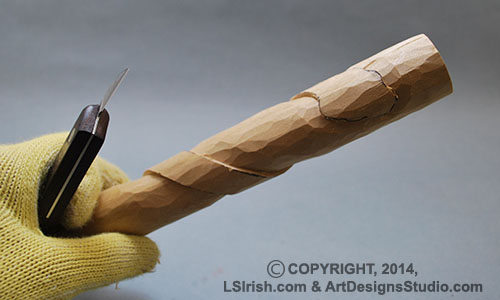
Work the stop cut around the snake’s head. Notice in the third photo for this step, below, that the snake’s body has been ‘freed’ from the background wood by dropping the background areas.
Step 6: Work the stop cuts along the snake body until you are about 1/4″ deep at the marked guidelines.
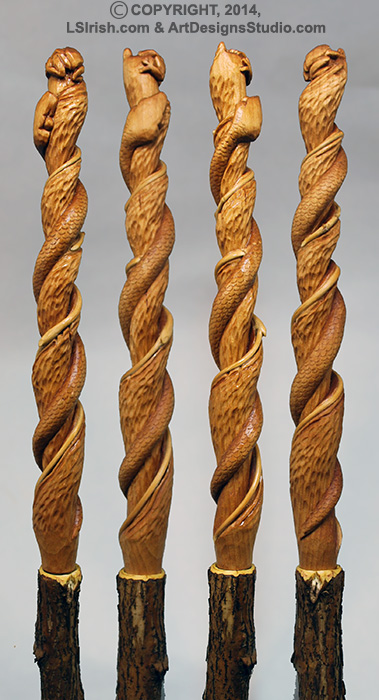
The wrapped snake is a classic design for walking sticks and canes, one that has a history as old a Genesis in the Bible in the story of the serpent twisted in the branches of the Tree of Knowledge. It is a powerful image and one that is so easy to create in our carvings.
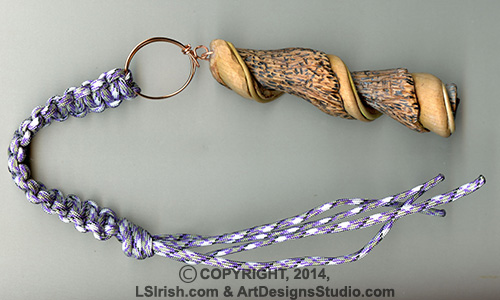
Using the wrapped tape method of creating the snake’s body path, you can quickly change the width of the snake by changing how thick or wide your tape is. The length of your snake also is easily adapted for either larger carving blanks or even short key chain sized blanks.
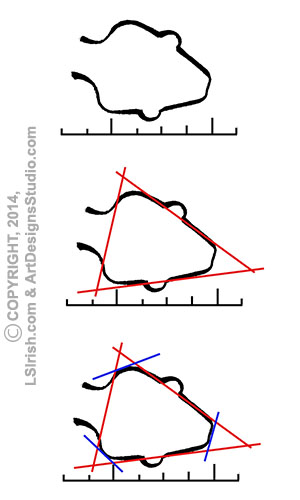
The snake head pattern is a simple to pencil mark directly to your wood. Begin with an equilateral triangle twice the size of the snake’s neck width.
Make a pencil line at each corner of the triangle to slice off the sharp edges. Now add a small half-circle just in front of the center point on each side of the triangle for your eyes. That’s it! Quick, easy, and fast.
Tomorrow we will establish the wrap of the sassafras twist and stop cut that area to create the second twist or wrap of the cane. Thank you for reading!!!! If you have any questions, now is a good time to sign up for one of the forums where you can chat directly with me.
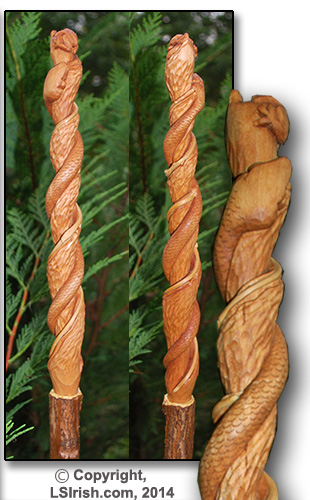
Walking stick carving is often one of the first carving projects a new woodcarver tries. This particular design – a snake wrapped around a Sassafras twistie stick – is a beginner’s level project, but I think that even the advanced carvers here may discover a few fun tricks and tips.
We will work, step by step, through creating the round, establishing the snake, marking and cutting the twist, texture the snake and bark, adding a frog on the top of the stick, and how to add a real honeysuckle vine into the twist. The cane will be lightly coated with a finished with a linseed oil and turpentine mixture and then dry mounted to your walking staff.
Supplies:
These are the tools that I used, but you do not need these exact tools or exact sizes. Use what you have. If you are new, a bench knife, or large chip carving knife, and a basic Japanese set will get you started. Because we will be creating the pattern directly to the basswood you can make this stick in any length!
1 1/2″ x 1 1/2″ x 12″ basswood blank bench knife or large chip carving knife v-gouge 3/8″ round gouge 1/8″ round gouge u-gouge, also called a veining tool several sizes of fine rasps or rifflers 220-grit sandpaper 1″ wide painter’s tape or masking tape pencil, for marking the cane old toothbrush for cleaning carving gloves thick terry-cloth towel sharpening tools cardboard center from a roll of toilet paper linseed oil turpentine all thread pipe epoxy glue
walking stick staff – approx. 4′ to 5′ tall, x 1 1/4″ diameter
We will begin tomorrow by rounding-over the basswood stick, establishing the path of the snake, and rough carving the Sassafras twistie area low to reveal the snake’s body.So, go get your knives and carving tools, check them for sharpness, find a basswood cane blank, and join me tomorrow as we begin this fun project. I’m off to start cropping photos for you.
I will also be posting this Twistie Stick Snake Cane each day on my favorite carving forums. Stop by, join up, so that you can post your questions and photos!!!! Carving forums are like potato chips … just one is never enough … Grin!
And while you wait to get started, visit Roy’s relief Carving Class thread – See our widgets in the right hand nav bar and on both forums!!!!
I had a question from one of the forums, and thought I would post the answer here too!
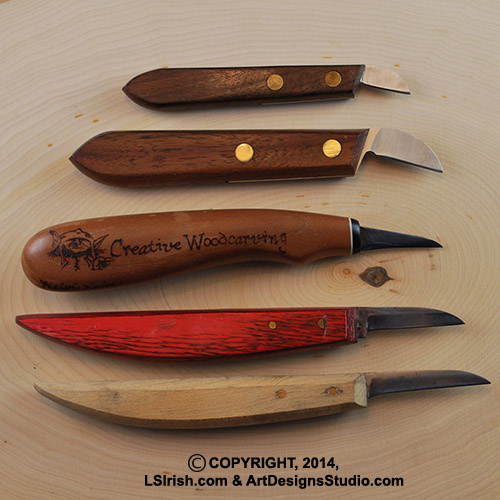
In the photo you can see five different bench knife styles – top to bottom – small chip carving knife, large chip carving knife, detailer, short-blade bench knife, and a long-blade bench knife.
I prefer a large chip carving knife as my main cutting knife whether for relief or for 3-d cane carving. My hand is small, much smaller than my husbands. Where the longer handles of the bench knives fit his hand, they are too cumbersome for me. Also, the short blade of the chip knife puts me hand right against the wood during the cut, a bench knife leaves my hand 1″ to 1 1/2″ away from the wood. The third advantage is that the chip knife serves two purposes – one for my regular carving and, of course, for chip carving.
If you haven’t gotten a bench knife yet, consider a large chip carving knife. While you are making your purchases also get some of the new self-adhering bandage wraps. You can cut a short – 5″ length – and wrap the handle of your knife to give added grip strength. Cut a longer piece – 12″ – and wrap your tool handles if you have arthritis. It will make the handles thicker for easier gripping as well as pad the handle to minimize the stress on your joints.