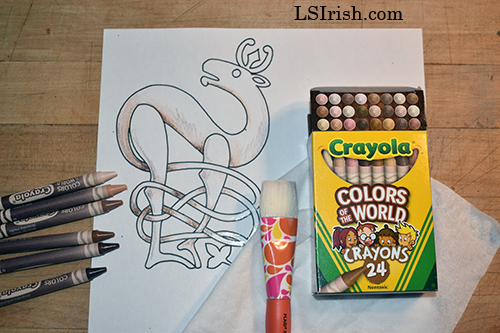
All these packs hold a range of yellow-brown, red-brown, and neutral brown color giving us, pyrographers, a full sepia scale to compliment our burnings.
Before you touch your wood watercolor paper, or gourds with your pen, use can use these color packs to establish exactly where you want your shading and how light or dark you want it.
Any mistakes or any decisions to change an area’s value is worked out on paper, not on your expensive basswood plaque.
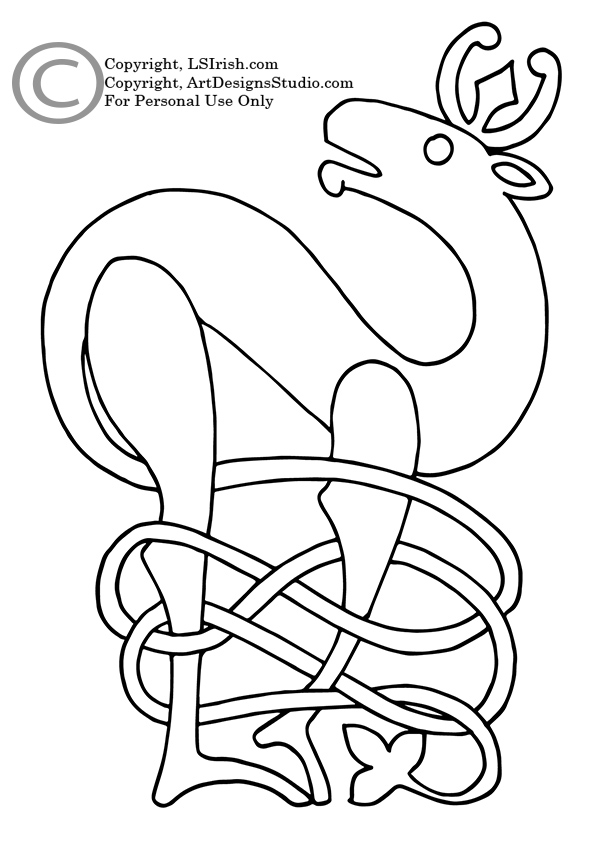
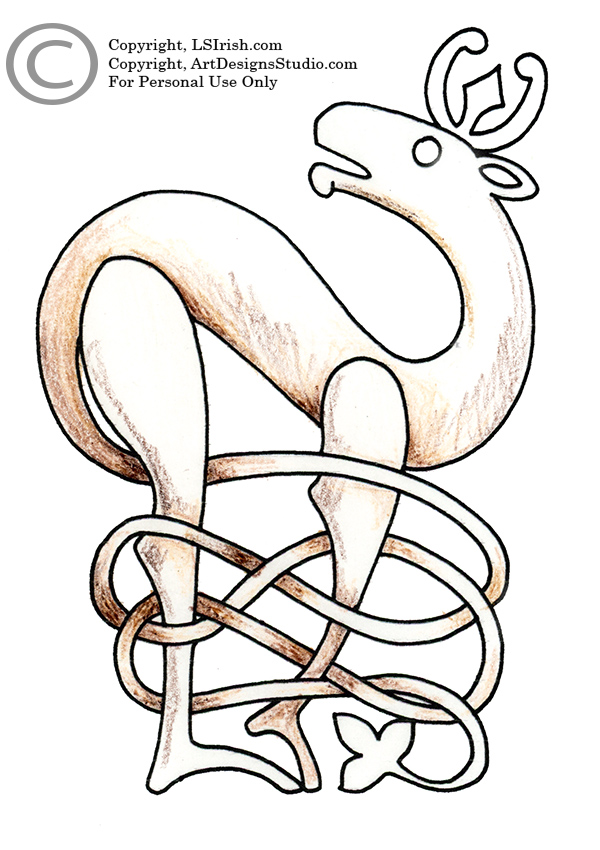
I have been working on three brand new e-projects for my pattern website at ArtDesignsStudio.com and in today’s work of one of these new e-projects I realized I had a set of images that taught the power of working with pure color hues.
I’d like to share these images with you !!! Please click on any image for a full-sized photo.
We work with three types of color in relationship to their tonal values – pastels, pure hues, and jewel tones.
Pure hue = a color that has not been altered by the use of white, gray, or black as red, yellow, and blue. Tonal value = the amount of white, black, or gray in a color as a pale gray tone to a dark gray tone. Pastels = pure color hues that have white added as pink, pale yellow, and baby blue. Jewel tones = pure color hues that have black added as maroon, deep gold, and gunmetal blue.
Tonal values in pyrography are what we use to shade and contour an area of the design, working in sepia (brown) tones.
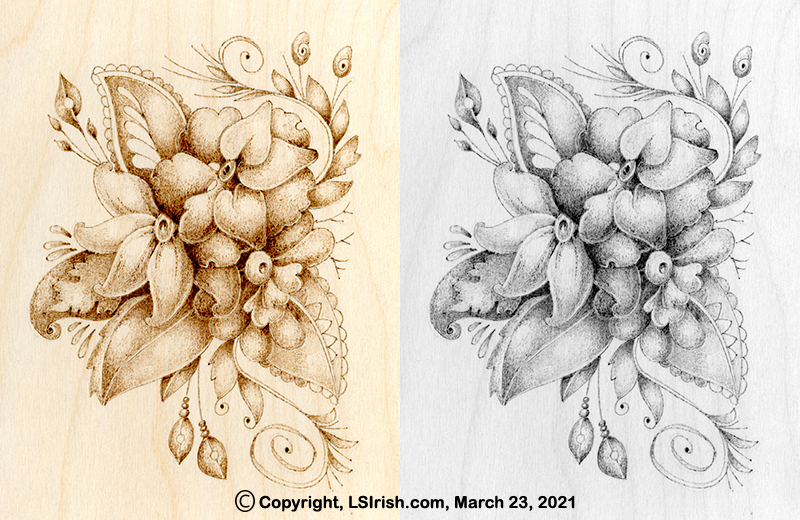
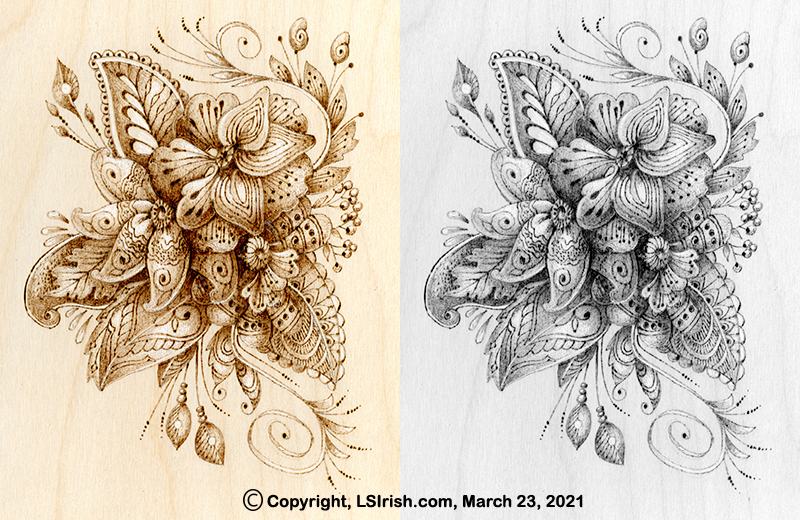
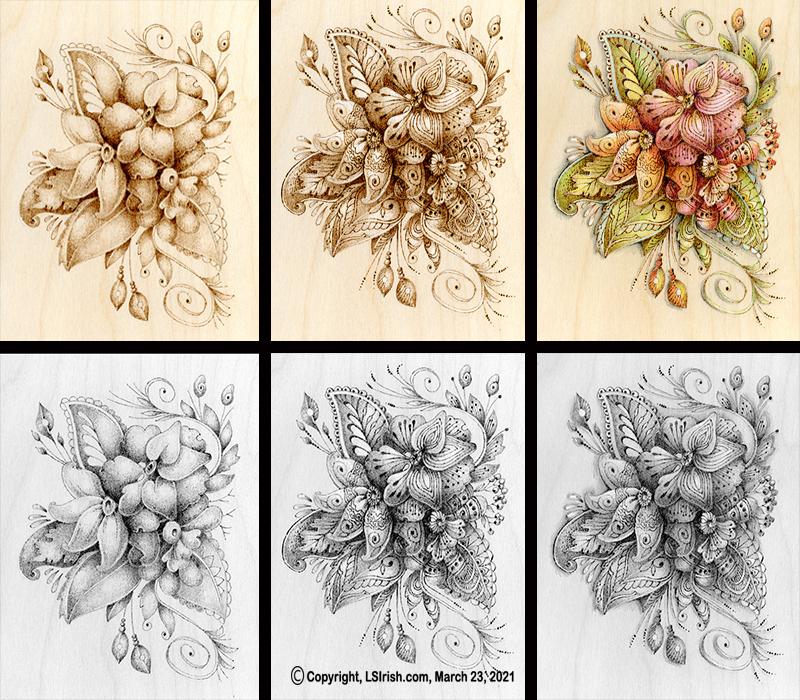
1 The images below show my pyrography shading for one of my upcoming new projects. I am working on birch plywood using my Colwood burner with my loop-tip pen and a soft, scrubbie stroke. The image to the right is the gray scaled photo of this shading which shows the black tonal value range.
2 After my shading was worked I added my fine line doodle detailing using my ball-tip pen at a medium-hot setting. Part of that detailing step included creating some solid black areas in the design. Again, to the right is the gray scale image, showing only the black tonal values. All tonal values to this point have been specifically created with the tool tip and burner temperature setting in my pyrography.
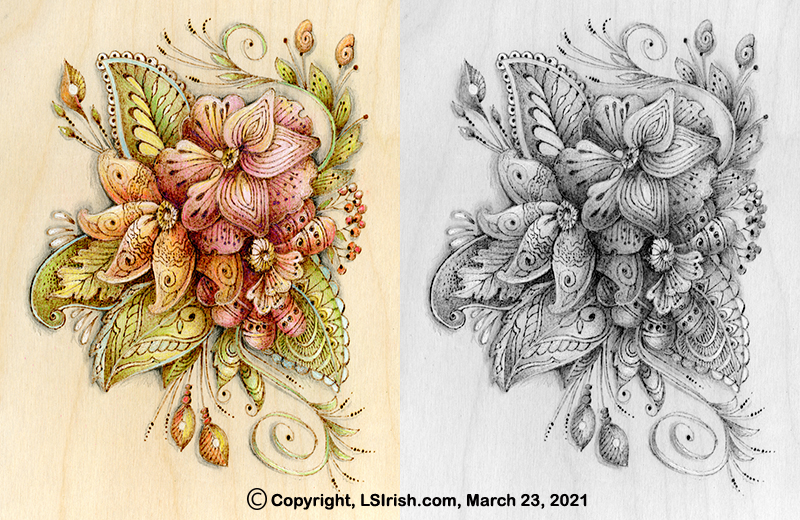
3 But what happens to that pyrography tonal value work when colored pencils are added to give individual coloring to the design. In this photo you can see the added color pencil work, using artist quality pencils which contain little or no chalk base. Inexpensive colored pencils, or school quality sets often contain chalk as the base filler which adds a white, gray, or black toning to the color hue. Artist quality pencils use either a wax base which makes the blending of the colors easy without changing the color tones or if you are using watercolor pencils no base at all.
I am working with pure hues – red, yellow, and blue or secondary and tertiary mixes of those hues. I have used some white as shown in the small left-side tear drop accents and I have worked a graphite pencil shading in the background area directly to the birch plywood.
4 Now let’s compare these three stages of work. Stage one is the simple pyro shading, stage two is the pyro detailing, and stage three is the addition of pure color hues using colored pencils. Now compare the gray scale photo of stage two to stage three and you will see that the colors have added very little to almost no tonal value to the work.
This means that all of my pyrography tonal value shading remains unchanged and therefore totally in my control even when I am laying colored pencil over the work !!!!
OK … I’m off to work on your new e-projects but will get back to you if I come across another ‘quick tip’ idea.
Even though the 1/8″thick plywood can warp with high-heat burning or high-humidity conditions, it is so light weight that the small quartz battery clock hanger fully supports the project – you can hang this anywhere.
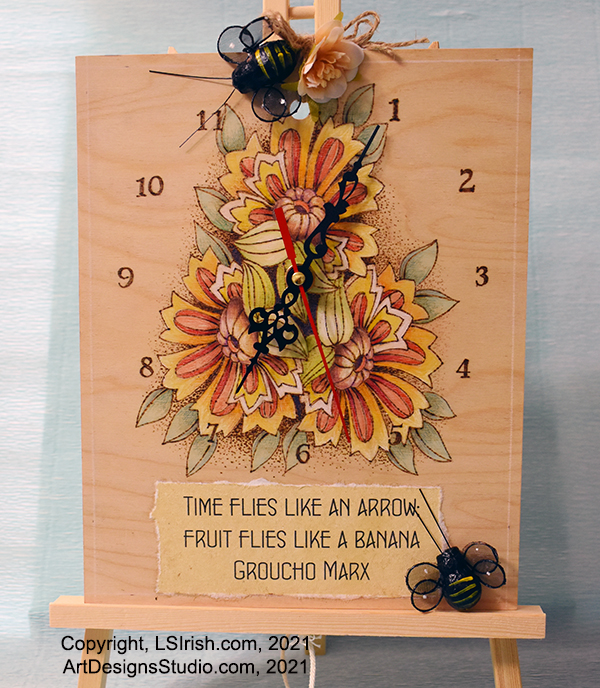
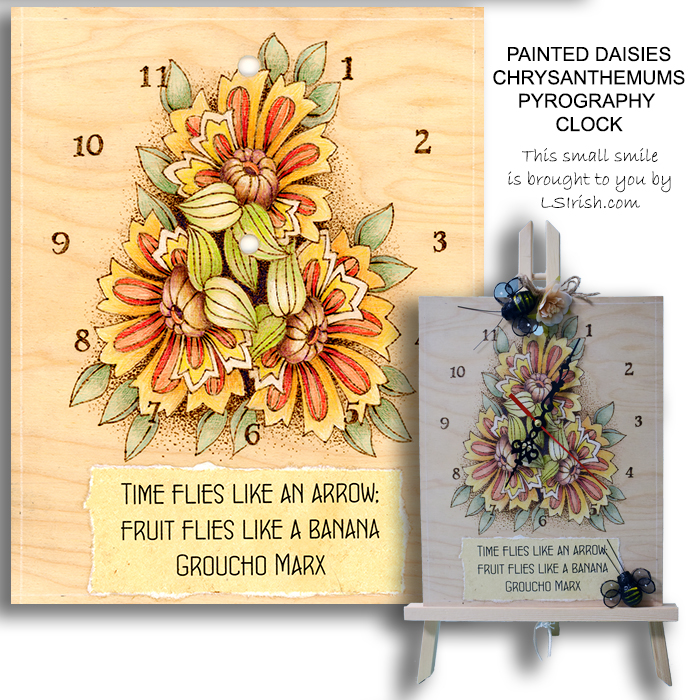
My finished painted daisies pyrography clock is show displayed on a small wood easel and, while meant to go into my kitchen is still sitting on my computer desk.
Your free Lora S. Irish pattern is just below the supply list.
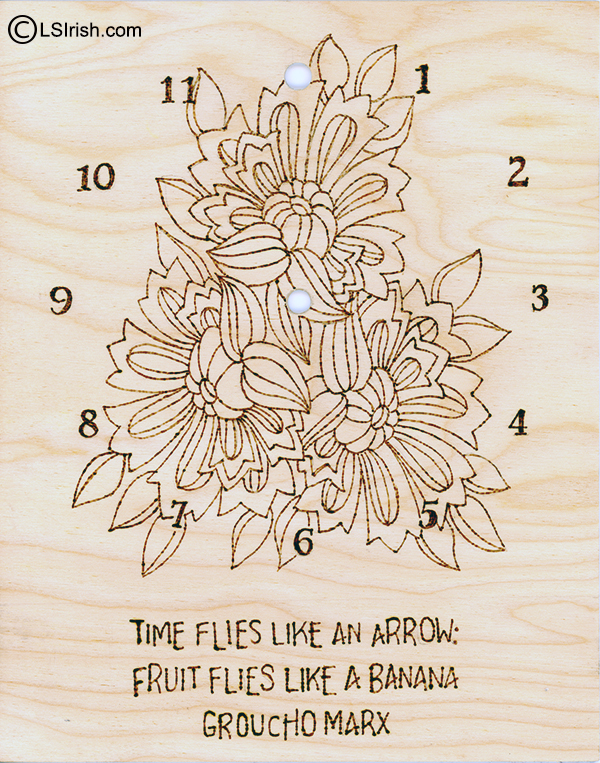
Step 1: Prepare your wood plaque by lightly sanding the wood with 220- to 320-grit sandpaper, working the sanding strokes with the grain of the wood. Remove all sanding dust. Using graphite paper, trace your pattern. Using the ball-tip pen and my Walnut Hollow Creative tool, I burned the general outlines of the daisy pattern, numbers, and quote onto my wood plaque. I used a medium-hot setting of 6 – 8.
When the outline is completed, erase any graphite lines or pencil lines that remain from the pattern tracing step.
Step 1
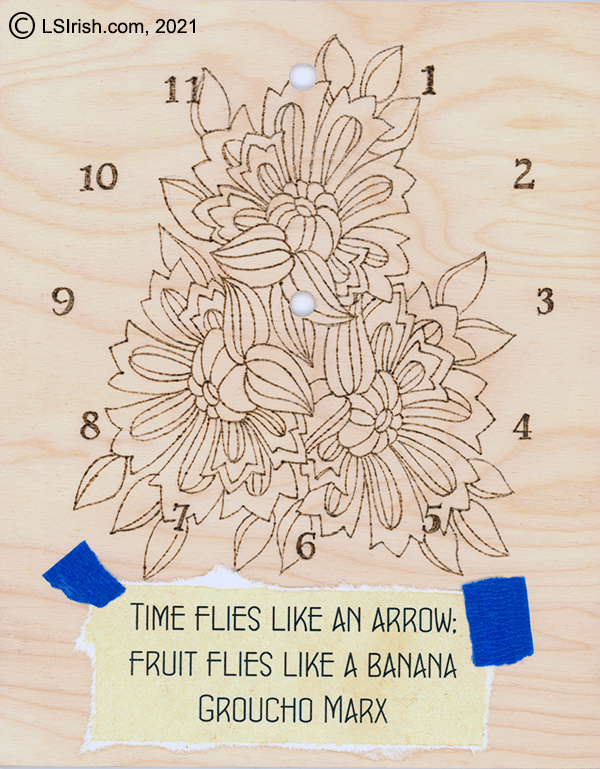
Step 2: I was not happy with my lettering burn, but very pleased with my outline work. My solution was to create a collage paper piece to add to the plywood that would carry my quote while covering up my wood burned letters. I chose a heavy, yet flexible antique paper that easily went through my home computer printer. You can see that collage piece temporarily placed over the burned letter.
Step 2
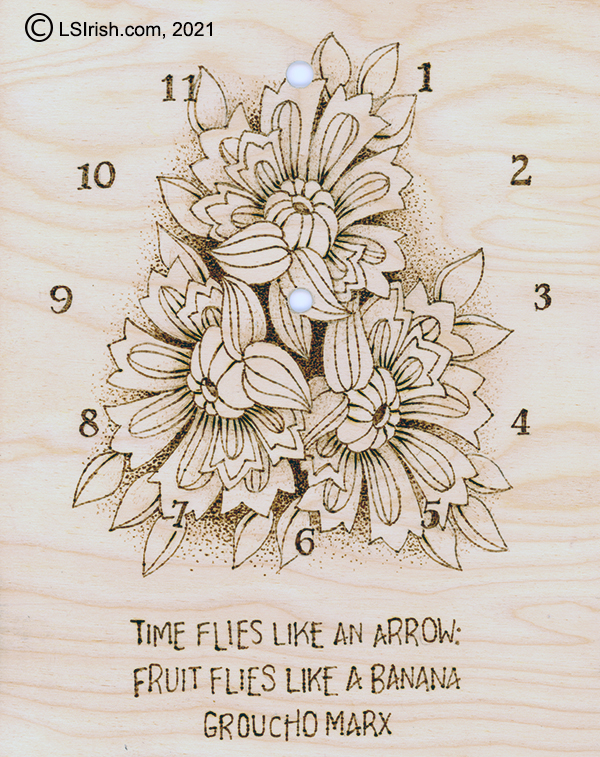
Step 3: Still using the ball-tip pen and a medium heat setting of 4 – 6, I have added shading to the background area of the pattern. Lowering the temperature a bit more to the 3 – 4 heat level, I then worked light shading into the flowers and leaves.
Step 3
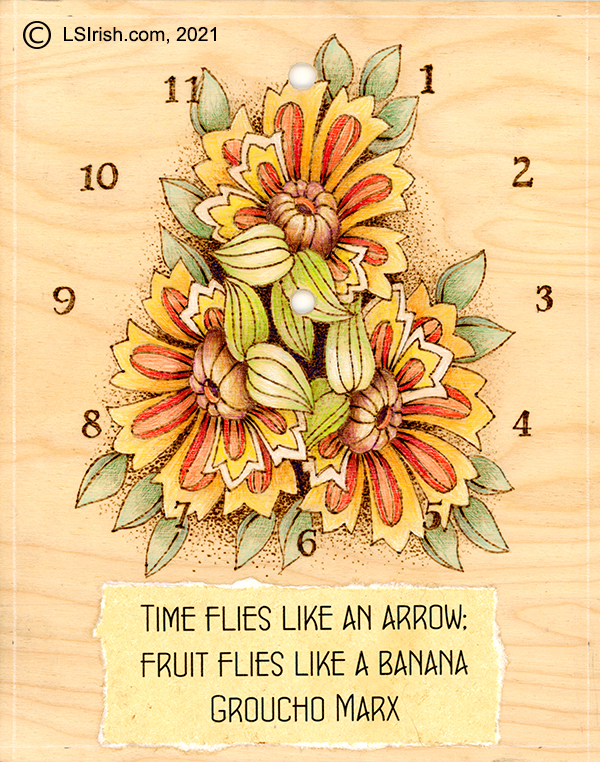
Step 4: When your burning is done its time to get out your favorite artist-quality colored pencil set. Do a quick google image search under ‘painted daisy chrysanthemums’ for coloring ideas.
I used tones of yellow through bright red for the petals, yellow greens for the inner flower leaves, and green teals for the background leaves. Tones of sienna, golden brown, and chocolate make up the flower centers.
Both white colored pencil and white chalk pastel pencil was used to brighten the highlights of the work.
Lay several thin lines of quick-dry tacky glue to the back of your collage paper. Use a stiff piece of card stock to evenly spread the glue. Position your quote to your plaque and press lightly into place. Place a heavy book on top of the quote to press the paper evenly to the wood and let dry.
Several light coats of matte spray sealer. The sealer protects your raw wood, colored pencil work, and collage paper.
Step 4
Step 5: Here’s my finished clock with the quartz clock movement inserted, bees in place, and just one fun silk flower.
Hope you have fun creating your own pyrography clock! Thanks for stopping by my blob ~ Lora