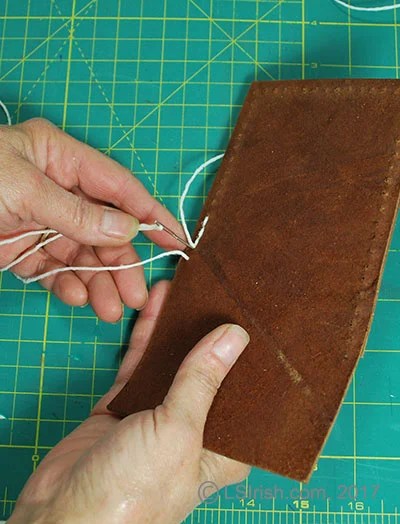
The double-needle stitch pattern in leather crafting is worked with one long waxed, nylon thread that has a blunt-point darning needle threaded onto each end of the thread. The stitch is worked by passing one needle through your starter hole and thread to the center point. This places one needle on the front of your work and one at the back.
Pick up the back needle and pass it through the next awl hole, pull the thread through the hole to secure the stitch. Pick up the front needle and pass it through the same hole that you just stitched, pull the thread to secure. This simple pattern is repeated until you have stitched the entire seam. Back stitch over several holes, adding a second stitch in each hole to secure the threads. End by passing each needle through just one layer of leather, bringing the needle out of the work between the leather layers. Cut the thread and with the needle point tuck it into the leather layers.
This is the simpliest of leather stitching and perfect for working multiple layers of leather as used in our Leather Pyrography Greenman Purse Project.

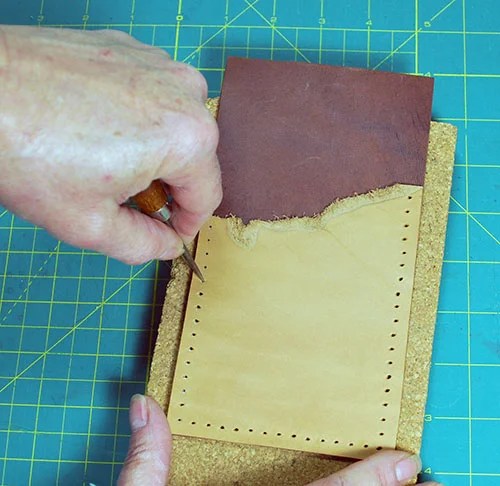
1. Using a ruler and fine point marking pen, mark a stitching hole guide along the seam allowance of your top leather piece to be stitched. For this sample I have marked my holes 1/4″ from the cut edge, with a 1/4″ spacing. Clip the layers of leather to be stitched together with the raw sides (inside) facing. Place your leather layers onto a thick cork board, or 1/2″ thick stack of newspapers. With an awl punch a hole at each of the stitch markings, taking the awl through all of the leather layers.
2. Cut a 30 – 36″ length of waxed, nylon thread. Thread one needle on each end of the thread. Pass one needle through the beginning stitching hole, pull the thread through to the center point of the thread. In my sample, my first stitch is worked in the fourth hole from the top of the seam. I will stitch these four holes towards the top of the seam, and then reverse my stitch, working over these holes a second time to anchor or secure the thread.

3. Pick up one needle, in this sample I have picked up the front needle. Pass the needle through the next adjacent hole to be stitched from front to back. Pull the thread to set it against the front leather. At this point both needles are on the back side of the leather.
4. Pick up the second needle, this is the needle that was on the back in step 3. Pass this needle from back to front, in the same hole that you just stitched.Pull the thread through the leather to set it against the back leather. You now have one needle on the front of the leather, and one on the back.

5. Gently pull of both threads to set the stitch.

6. Continue stitching, always using the same pattern of needle insertion (front to back, back to front) for the remaining stitching holes until you reach the first, top hole in the seam.

7. Reverse the direction of your stitches to double stitch the stitching holes that you have just finished. You will have two threads – two stitches – in each of the first four holes on the seam which will hold your thread secure through the life time of the project.

8. Work all of the remaining stitching holes along your seam. When you reach the end of the seam, back-stitch for four holes to secure this end of the threads. Bring the needle out of the leather between the leather layers on the last stitch. Clip the thread and then use the needle to tuck the thread tail in between the layers.
