Step 9: Adding the hair ornaments
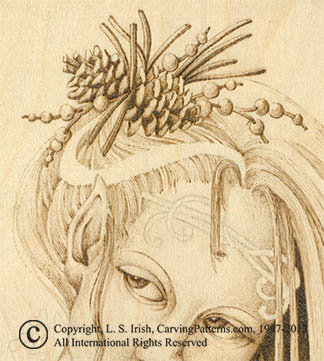
The pine cone and berry cluster hair ornament places a dark accent in the center of the highlight area on top of her hair. White pine cones can be almost black in the petal area of the cone with soft tan or beige tips on the end. That particular combination of color tones works with the contract focus of this design. The needles have been worked to a dark tone to carry this deep coloring throughout the ornament. Several branches of berries pull the dark tones away from the center of the ornament further into the hair area.
Because I am using shadows to define the shape and contour of the paler areas of this burning this ornament will eventually cast shadows into the underlying hair areas.
Step 10: Shading the hair under the ornament
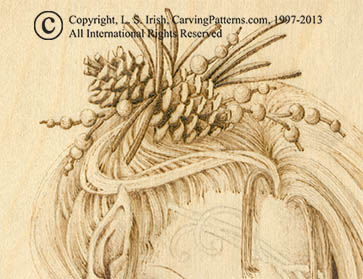
I have added the some shading under the hair ornament and once again darkened the background hair behind her shoulder. A small touch of mid-tone shading under the hair ornament pushes the hair down, giving it a slight roll from the puffed area at the top of the forehead. At this point enough shading has been completed in this hair area that the two remaining unburned hair strands now stand out as highlighted strands. I have worked a small amount of shading in the hair under the unburned strands to add a touch of shadow.
Step 11: Neck ruffle and head dress
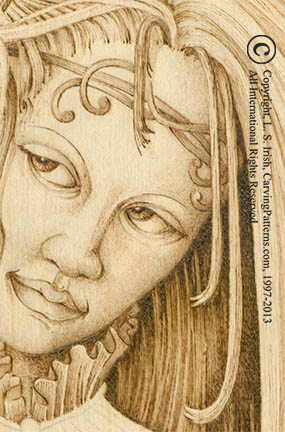
I’ve added her collar, keeping it more towards the pale tones as it falls on the sunlight side, left side, of the burning. As the collar rolls around the neck towards the right side of the design the collar moves into a mid-tone range of shading close to the tonal value of the right side of hair. Notice that the left side of the collar has unburned highlights at the top of the ruffles.
Her head band has also been added. When I added the head band I did not have enough room for contrast between the strands of bangs, the shadow on the right side of her face and the head band color. So I chose to darken the face shading and darken the head band from the center of her right eye towards the right side of her face. This gives a stronger look to the paleness of those two hair strands. The left side of her hair was darkened with a new layer of burning to create more contrast to the left side and shadowing under the hair ornament. I have been working the hair with long line strokes but when I began working the head dress I returned to the tight random doodle stroke.
Step 12: Collar details, yoke and buttons
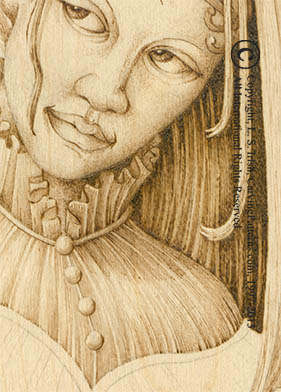
The folds in the collar ruffles and yoke have been worked similar to the strands of hair. Each fold has its own highlight, mid-tone and shaded side, always working with the highlights towards the left side. As the Pixie’s dress moves away from the left side it takes on a generally deeper tonal value. The highlights are burned as a very soft tone with the deep shading, especially at the ribbon under the neck ruffles becoming very dark.
Because her head is lilted it casts a shadow onto the collar and upper shoulder area of the right side yoke. I worked the ruffles and yoke folds in this area first to round the dress area then laid the head shadow on top of the dress burning.
I chose a small cross hatch pattern in a few areas in this ruffle and I want to imply a fabric weave to distinguish the ruffles from the bodice yoke.