Step 3: Third, medium temperature burn
I like to do several medium temperature layers in any project. This lets me darken my tonal values slowly and still allows me lots of room in the design for very dark tones. With this layer I left my unit’s temperature setting at the 6 level.
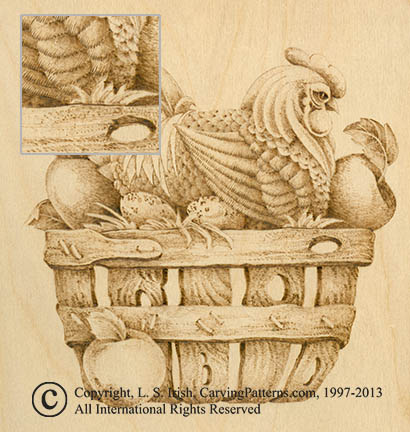
For this layer I have reworked the wood grain in the basket spokes and ribs where those pieces of the basket would fall into a shadow area. This places a layer of burning on the upper area of the wood grain where the spoke falls under the rib and a second area at the bottom of the spoke area where the spoke tucks under the next rib.
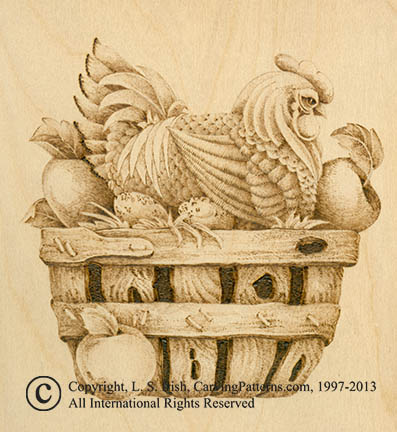
I have reworked the entire body of the hen. This has darkened the area of her body where she sits in the basket as well as adds more shading to each of the feather areas.
This third burning has deepened the sides of the spokes and the spoke holes closer to the dark or black tones.
Step 4: Fourth, medium-hot temperature burn
My first layer created my pale tones, the second brought up my mid-tone areas and with my third burning I established my dark mid-tones. Now that I am working my fourth layer of burning I am ready to find my blackest tones. Because I want to go into the blacks I have turned my temperature setting up to 6.5.
The darkest black tones for this burning fall in the open spaces of the basket and inside the basket spoke holes. I have worked these with a slow tight short line stroke letting the burning stroke fill the entire area. I have also worked the deep shadow spots in the apples on either side of the hen’s body and in the hen’s body where it falls behind her eggs. A little touch of black along her tail feathers brings this dark tone up into the design area.
At this stage in the work I have given my Red Hen project a light sanding, with fine 320 grit sandpaper, to remove the burned carbon left on the wood from this hot burning. A soft lint free cloth removes the dust. I find that large areas of hot dark burnings can leave a rough feeling to the wood; this sanding step returns your project surface to a smooth finish.
After the sanding is complete I like to turn my tool temperature down to my original setting. For this project that was at 5.5. With this cool temperature I have worked over most of the burned areas with a very pale burning that blends the different layers into a gentle graduated effect. You may not be able to see this last low temperature burning except for the blended finish of your project.