Smoothing an Area
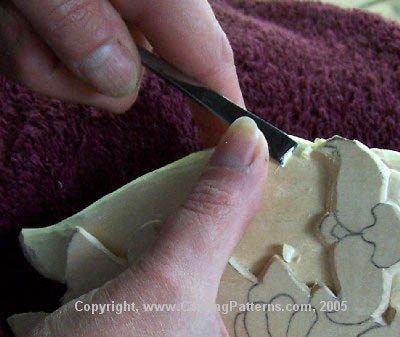
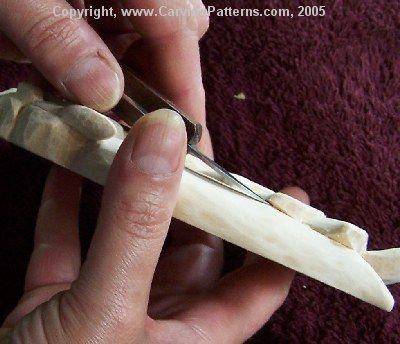
To smooth out all those nasty ridges from the round gouge in Santa’s beard I use a straight chisel. That’s the one shown in this photo. I also have a bull nose chisel that is a true delight. It has the same profile as a straight chisel except that I have rounded over the very sharp corners of the profile. It’s those sharp corners on straight chisels that give me fits!
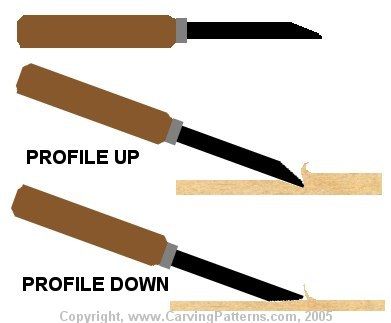
The diagram will make it easier for me to show you what I do … Your straight chisel has a cutting edge angle. The top surface or face surface is the angled side of the tip with the back surface remaining flat. The thinner the angle the better the chisel cuts soft woods as basswood. Wider angles work better for harder woods.
If you use the chisel with the flat to the board it “drives” the tip of the chisel into the wood. It bites deeply and therefore takes out a lot of wood with one pass.
If you turn your chisel over so that the angled profile face is against the board the chisel glides over the floor lifting just very nice thin slivers. I use my straight chisels right side up for rounding over but I use them upside down when smoothing my backgrounds. You can not only make it very smooth you can create an almost polished surface by going profile down.
For edges and rounding over during the smoothing steps I am back to my bench knife on the easy to reach curves.
If you look closely at that first photo you can see that I am using a bent straight chisel … the shaft has a slight curve to it. Notice that the curve is down putting my hand below the surface of the wood.
Click the images for a close-up view.
Undercuts
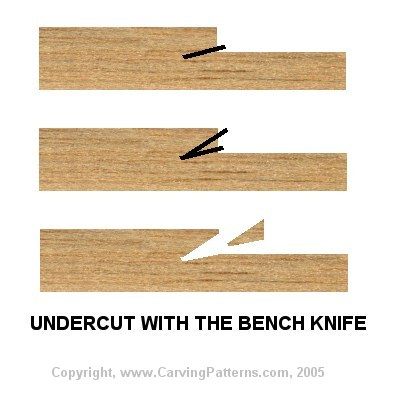
The undercut tucks your joint line underneath an element in the carving where no one in this world can see that the joint line isn’t quite straight, smooth, or perfect. It’s a great place to hide joints!!!
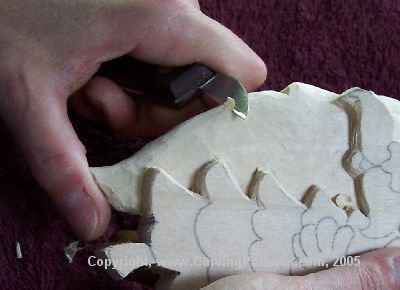
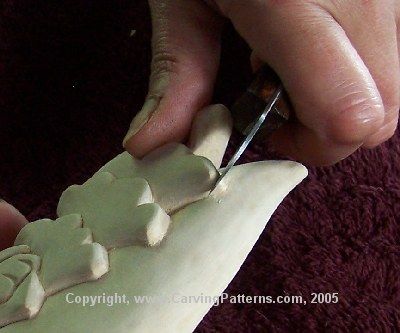
I make my undercuts using a bench knife but they can also be done with the straight chisel. I like the bench knife because I can pull it through the cut where with the chisel I tend to push … same compressed fibers problems later.
The first cut is made as level to the floor as possible. But usually it gets tipped or angled down a bit, which is OK. The second cut starts about half way up the wall side and angles down to meet the first cut. This pops out a little triangle of wood. I fold a piece of sandpaper and tuck it into the undercut to clean the hidden joint.
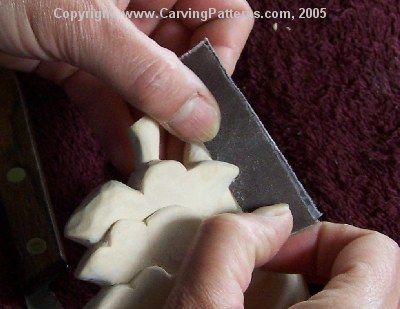
I have finished with the straight chisel and done just a light quick sanding. There are almost no chisel ridges left. Since his beard is bound to be v-gouged for hair I stopped here … smooth enough. But for another project that required a very smooth surface I would have smoothed one more time using my chisel. Then there would have been no ridges at all.
Click the images for a close-up view.

hide hard to clean or hard and smooth joint areas.
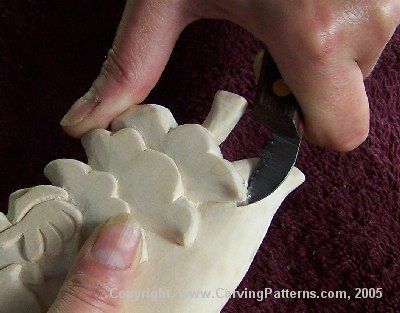
Textures
Here’s Santa almost completed. Notice how the v-gouge hair lines in the beard and mustache disguise the joint line. There are times that a joint area is very hard to reach or difficult to smooth. Consider using textures and detailing in one of the two elements that create that joint line. Texture patterns attract the eye to the texture and therefore away from an imperfect joint.
Click image for a close-up view.