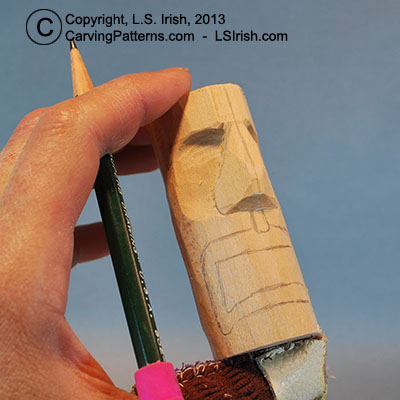
 Step 9: With the eyebrow ridges, eye and cheek areas, and nose established it is time to mark a pencil line for the mouth and lip fold.
The mouth area is another great place to create your own unique Tiki faces. You can used closed lips with upturned corners for a small smile or try using thick, heart shaped lip for your Queen. You can also vary the sizes of your lips with the upper lip very thin and the lower lip thick.
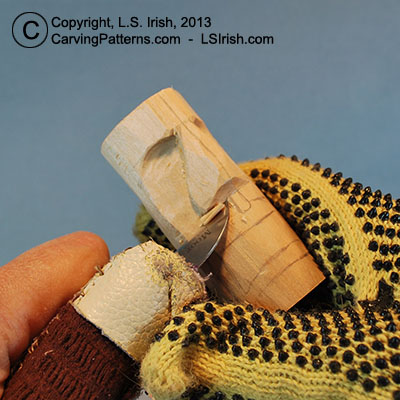 Step 10: Using my large chip knife and a push stroke I lower the upper lip where it touches the nose shelf. Work both sides of the upper lip from the lip fold towards the outer edge of the mouth. A detail knife, which has a longer and narrower blade edge then the chip knife, works wonderfully for this step.
The space between the nose shelf and the top of the upper lip can be altered. Use a shallow space to allow room for extra large teeth. Elongating this area pushes the mouth away from the nose, giving your Tiki a pout expression.
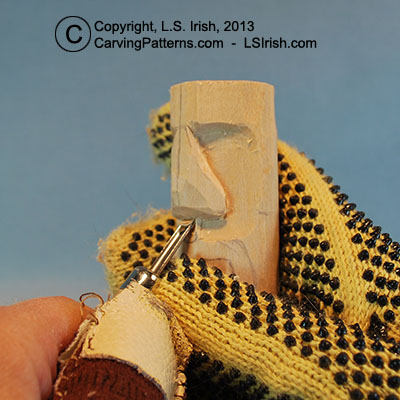 Step 11: My small round gouge created the lip fold. Using this gouge cut towards the nose shelf. Next use your bench knife or chip knife to stop cut the gouge stroke, releasing the wood sliver.
 Heart Shaped Patterns at ArtDesignsStudio.com Heart Shaped Patterns at ArtDesignsStudio.comEighteen line art craft patterns worked in a heart-shaped design. Perfect for applique quilting, scrapbook accents, and even paper cutting flourishes. Create quick and easy kitchen trivets using 1/4″ – 3/8″ stock and your scroll saw. |
Pingback: Wood Carving Techniques | LSIrish.com